#1: Building a long-range rifle in 300 Jr. EDITED Author: Vince, Location: Brisbane AUSTRALIAPosted: Sun May 27, 2018 4:11 am ---- Okay guys, as promised, here is the start of a new build. This rifle will be chambered in 300 Jr., which is a cartridge I designed and developed...
Here is a little history on the 300 Jr.:
I designed and developed this cartridge in 1994 as a tribute to my dad. The first rifle I built and chambered in the 300 Jr., was to be a gift to my dad, and when I completed the build, he wanted me to shoot a deer at 1,000 yds. with it. So, I did a complete load development on this gun and when all was said and done, 300 yard groups averaged just under an inch, 600 yard groups averaged around 2 1/4 inches and 1,000 yard groups averaged around 5 inches. Understand that I am a deer hunter and not a target shooter in any way...
I shot this gun to the maximum limit of my rifle range, which was 1,380 yards long. It use to be a place where crop dusting planes landed many years earlier. The scope stayed sighted in to strike point of aim at 600 yards, and was dialed in, in 50 yard increments, from 600 yards to 1,380 yards. All of this took place just before deer season in 1994. I had also shot a lot of deer at my shooting range, but not too many that were past the 1,000 yard mark...
Early one morning, a couple weeks into deer season, I was setting at my shooting bench, waiting for a deer to walk out into my shooting lane. While waiting for a deer to show up, 2 gentlemen showed up and identified their selves, and asked me what I was doing. I don't remember their names, but one was a Federal Game Warden and the other was local. I told them I had planned on shooting a deer at long range, and I was waiting on one to step out. They looked my rifle over, asked a bunch of questions, and asked if they could record me shooting a deer. I told them they could, only as long as I got a copy of the tape. They agreed, got their equipment out, and waited with me...
We waited and talked for probably an hour or so, and a deer finally showed up. The Game Wardens were watching through my spotting scope and binoculars. The range was 1,118 yards, and I thought the deer was closer to my range marker than what it actually was. There was "0" wind to contend with, so I dialed my scope in at 1,100 yards. I got settled in behind the gun, put the cross hairs at the top point of the front shoulder, and very gently touched the 6 oz. trigger until the gun fired. The deer just stood there, and I was heartbroken. Probably a good 10 seconds went by, and the legs just buckled under that deer, and it dropped straight down. Then another long 5 seconds went by, and the deer laid over on its side. One deer down, a perfect shot and we got it on film!
While the guys were congratulating me, one of them kept looking through the spotting scope, and said - there's another deer!
They were still set up to record, and asked if I would or could shoot another deer. I said yes, looked where it was standing, and it was next to the tree line, at the very end of my range, 1,380 yards away! I dialed my scope in, let my pulse rate slow down, and began the trigger pull. Cross hairs were on the top point of the front shoulder, and about 4 seconds later, this deer dropped and never moved a muscle! I asked the guys if they were able to record it, and they did...
About a month later, the local Game Warden came by my house, and brought a video of the 2 long shots that I had made. We ate dinner and watched that video 3 times! I was so proud of that video and wanted to pay the Warden for it, but he said the experience of watching those shots was all the payment he needed!
I had sent the video to my dad for him to watch, and it was a couple of weeks later before I got in a good enough gun case to ship that gun off in. I called my dad and told him his gun would be shipped off as soon as I got it ready, and it would ship out in a couple of days. Talk about excited!!! I had everything laid out and had just put the rifle in it's case, when the phone rang. My sister called, and said our dad just passed away....
So needless to say, this build means a lot to me, and in a lot of different ways. It will be a slow build, because everything has to perfect, and if I cannot do it to absolute best of my ability, I won't do it!
A big thank you to my customer for the opportunity to build this rifle and thank you for allowing me to post pictures along the way...
My 300 Jr., it is based on a maximized 280 Remington case with minimum body taper, a 40 degree shoulder angle and a short neck...
My furthest shot to date was with a 300 Jr. rifle that I built, and the range was 1,862 yards.. A shot that I will never be able to duplicate!
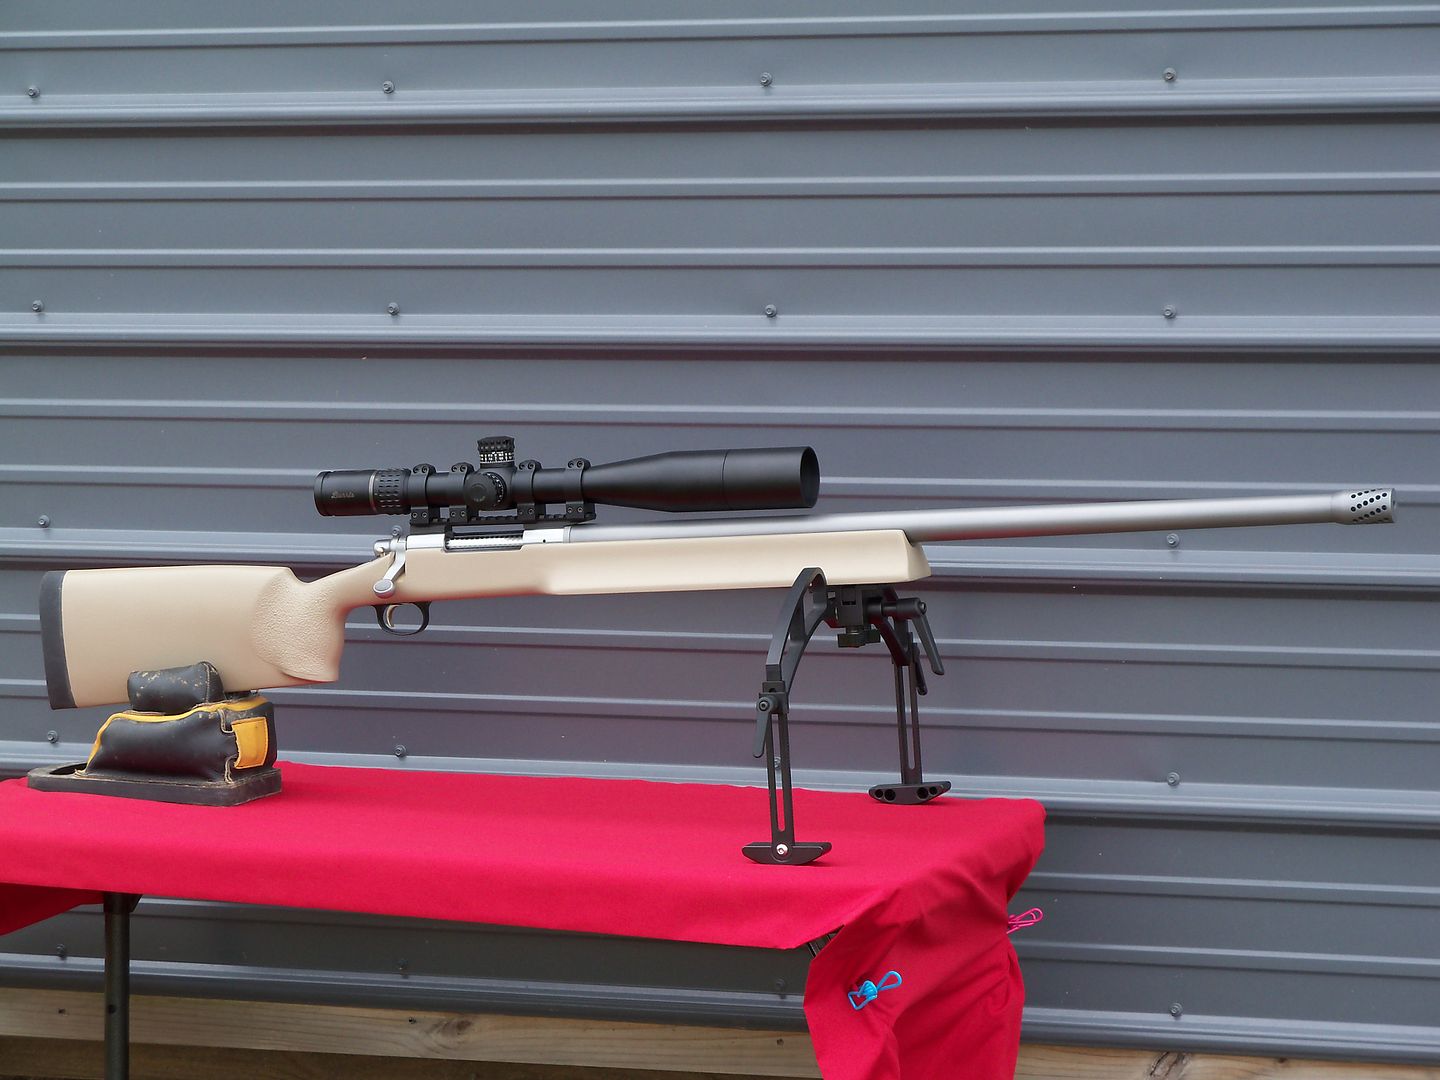
The action is a Remington 700 long action that will be set up as a single shot and will be blue-printed to match specifications...
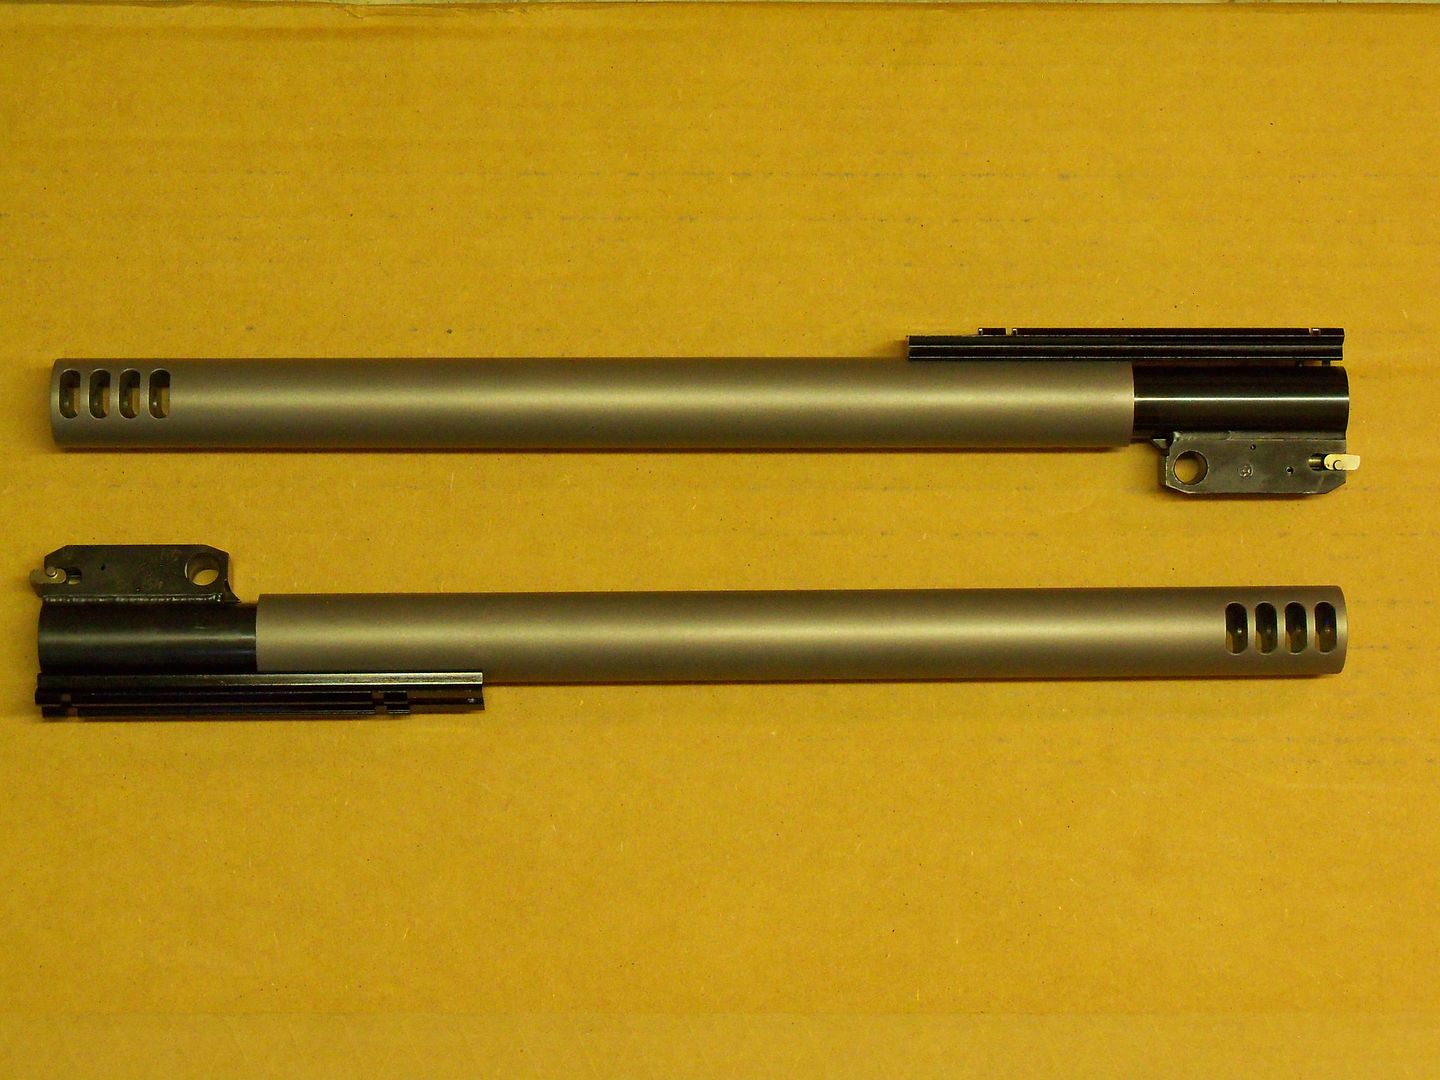
The barrel is a Bartlein .30 caliber / 1-10" twist rate / 32" length / finish length will be 30" plus the addition of one of muzzle brakes, for an overall length of 31 1/2"...
The stock is a McMillan MBR with a 3" wide forend...
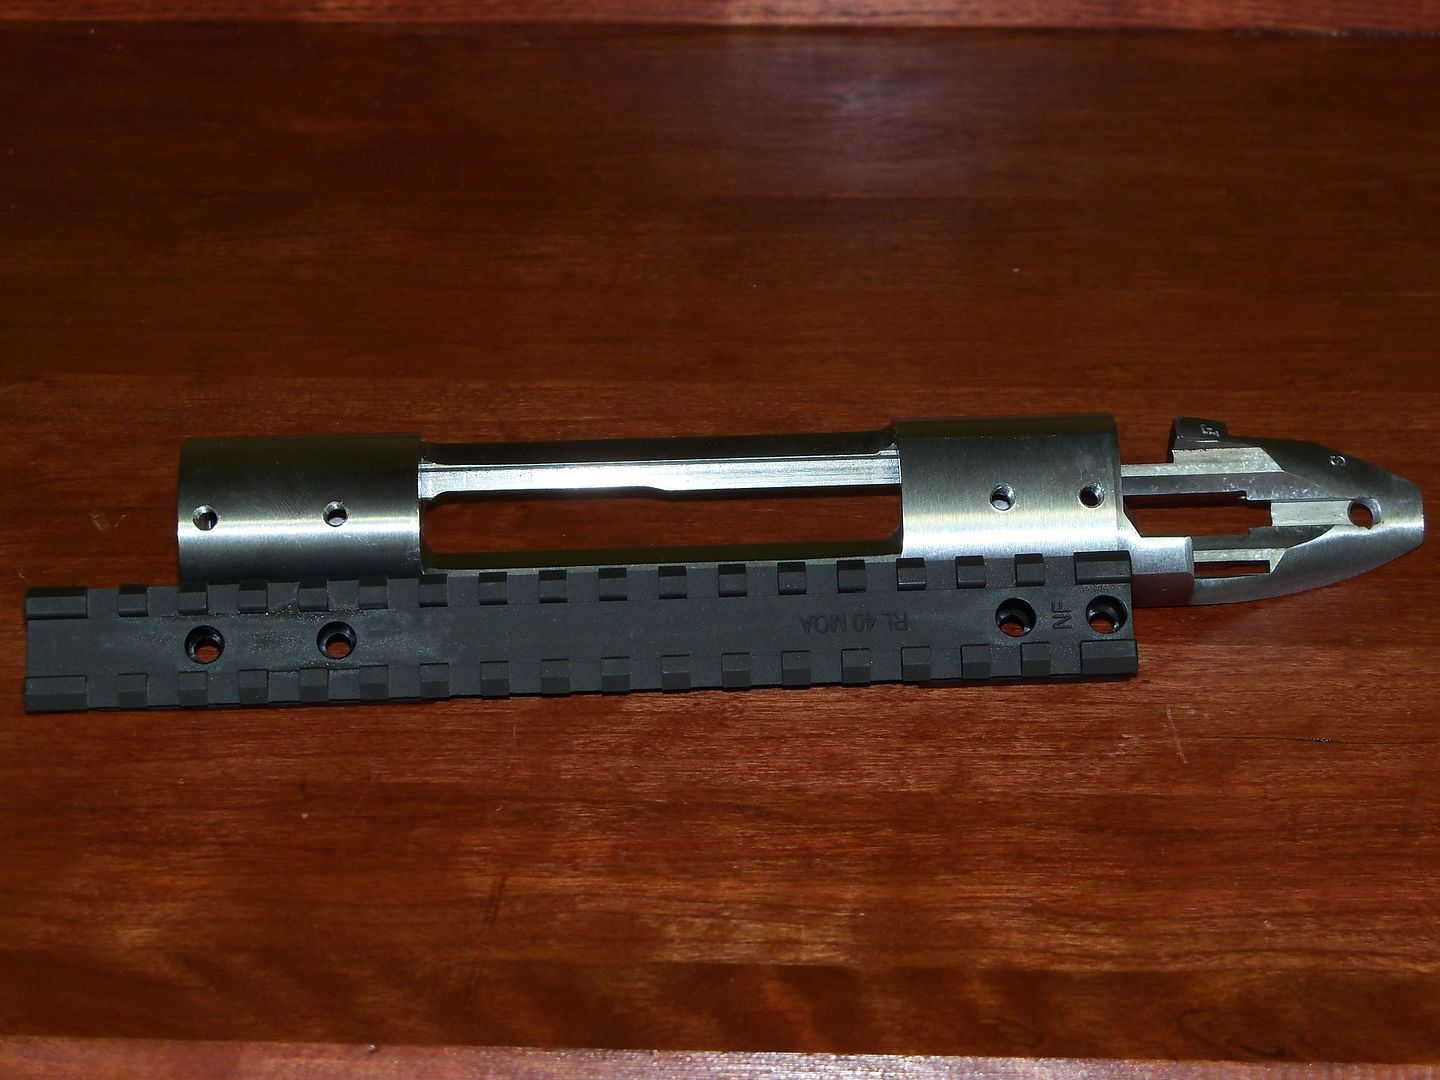
Some of the accessories that go with this build: Oversize recoil lug / lightweight firing pin with heavy duty firing pin spring / steel scope base with .040 taper / base and action will be modified for the larger 8-40 screws / steel trigger guard with new action screws / single shot follower that will be glued in the bottom of the action / trigger that will be adjusted and set to 10 oz. per customer request...
Last edited by Vince on Sun May 27, 2018 4:49 am; edited 1 time in total
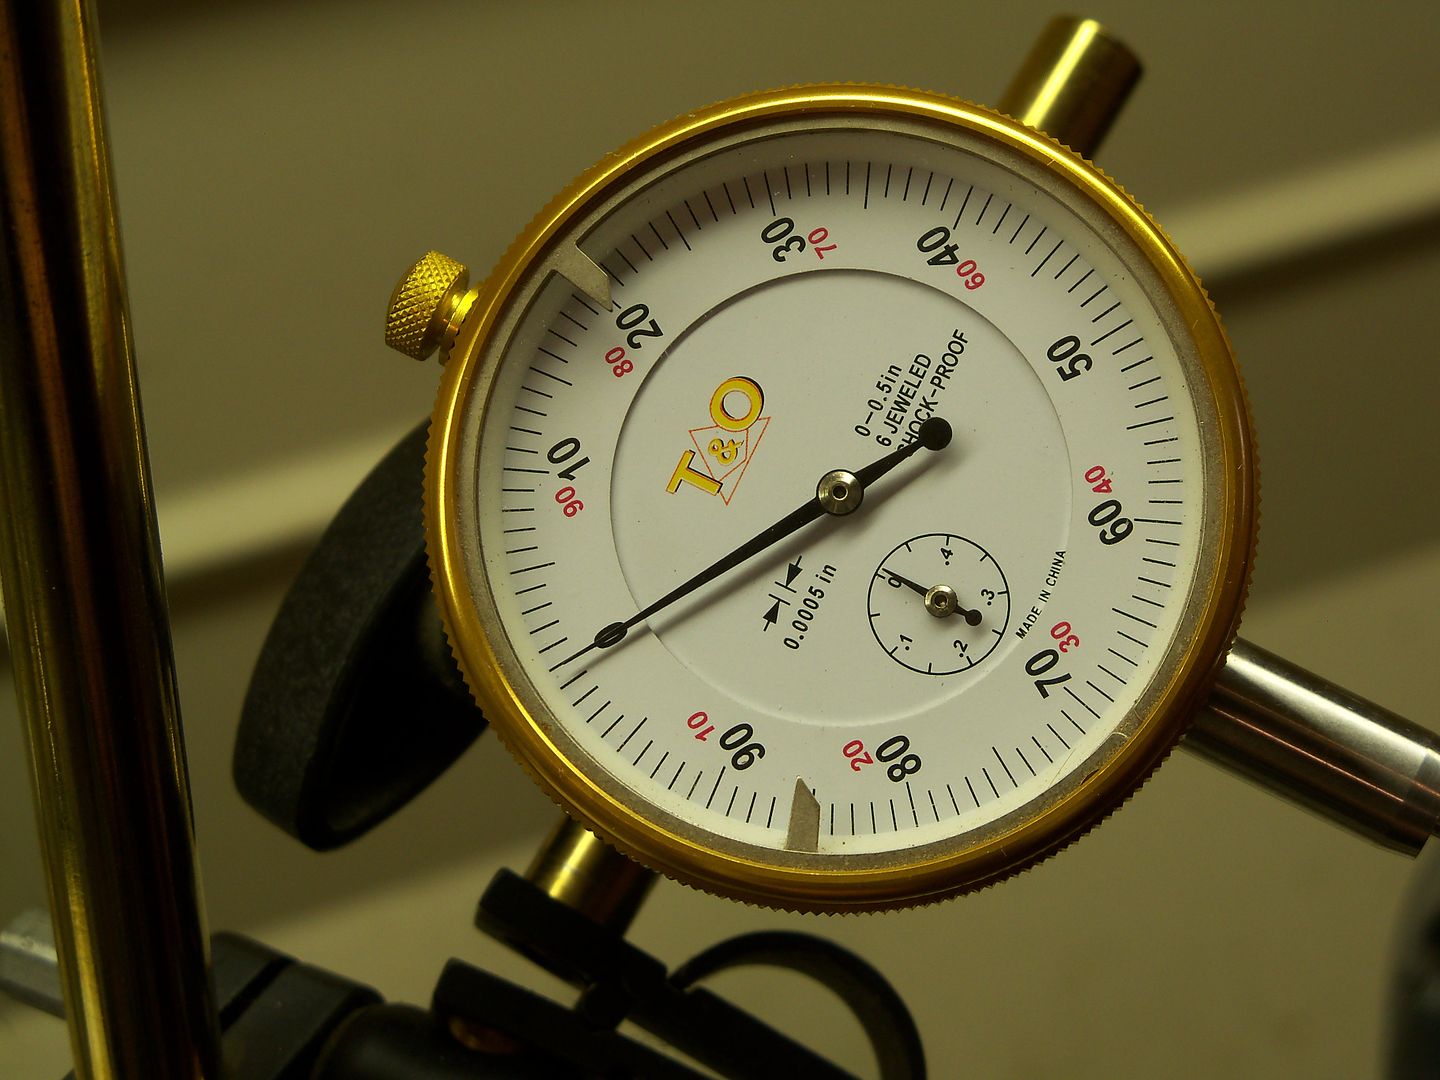
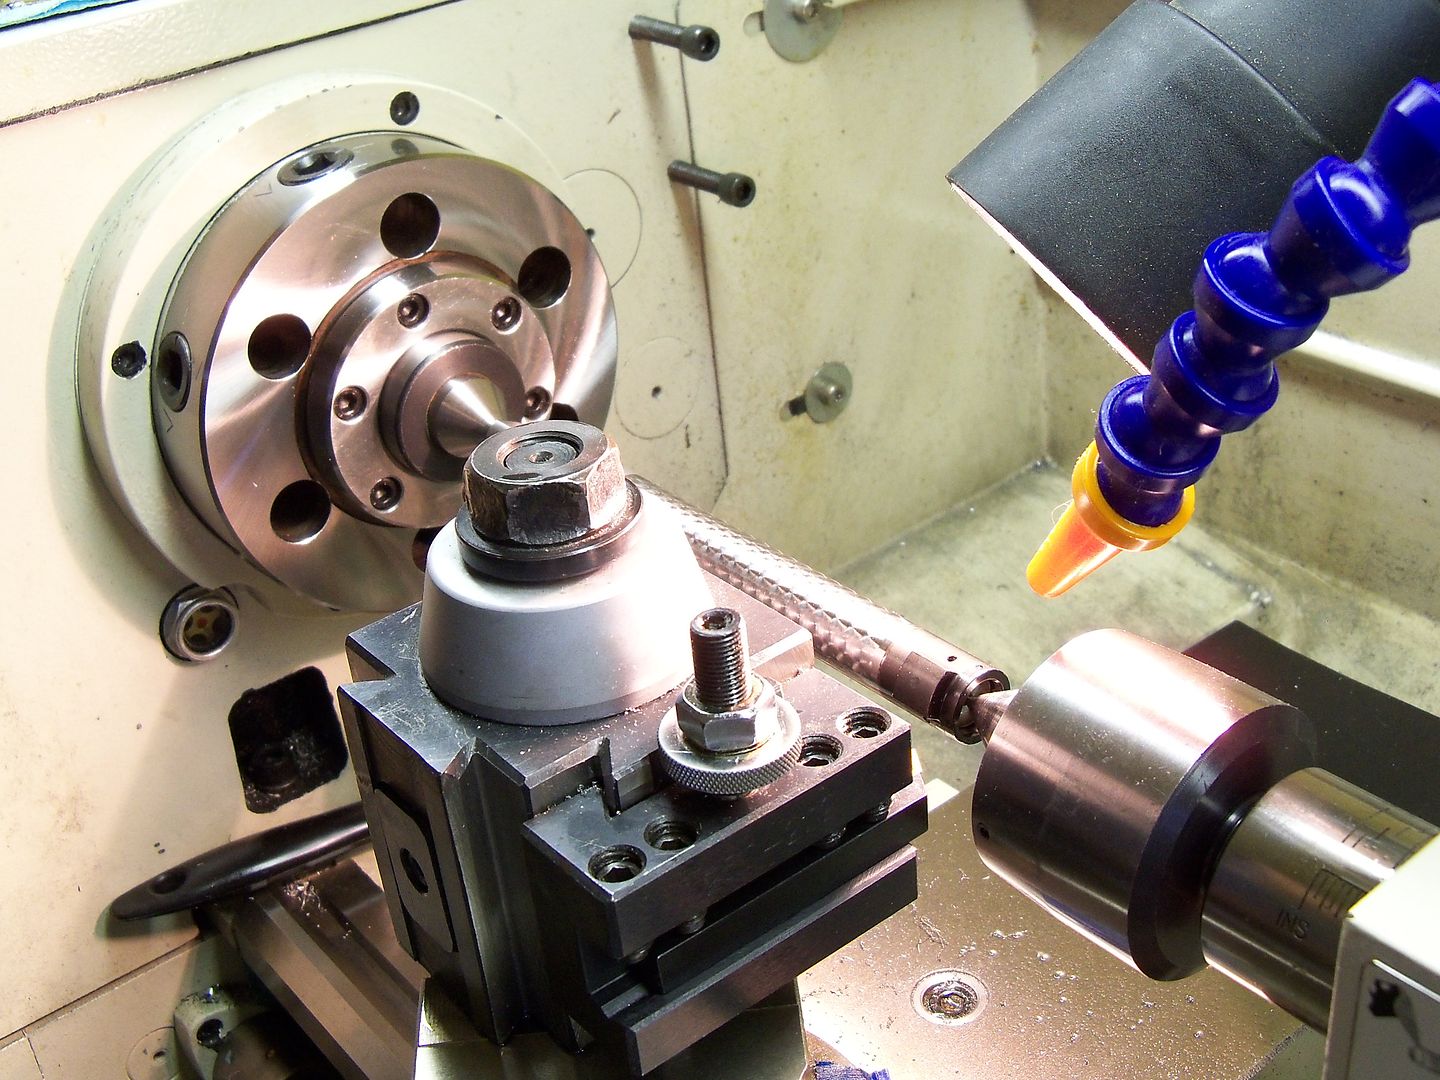
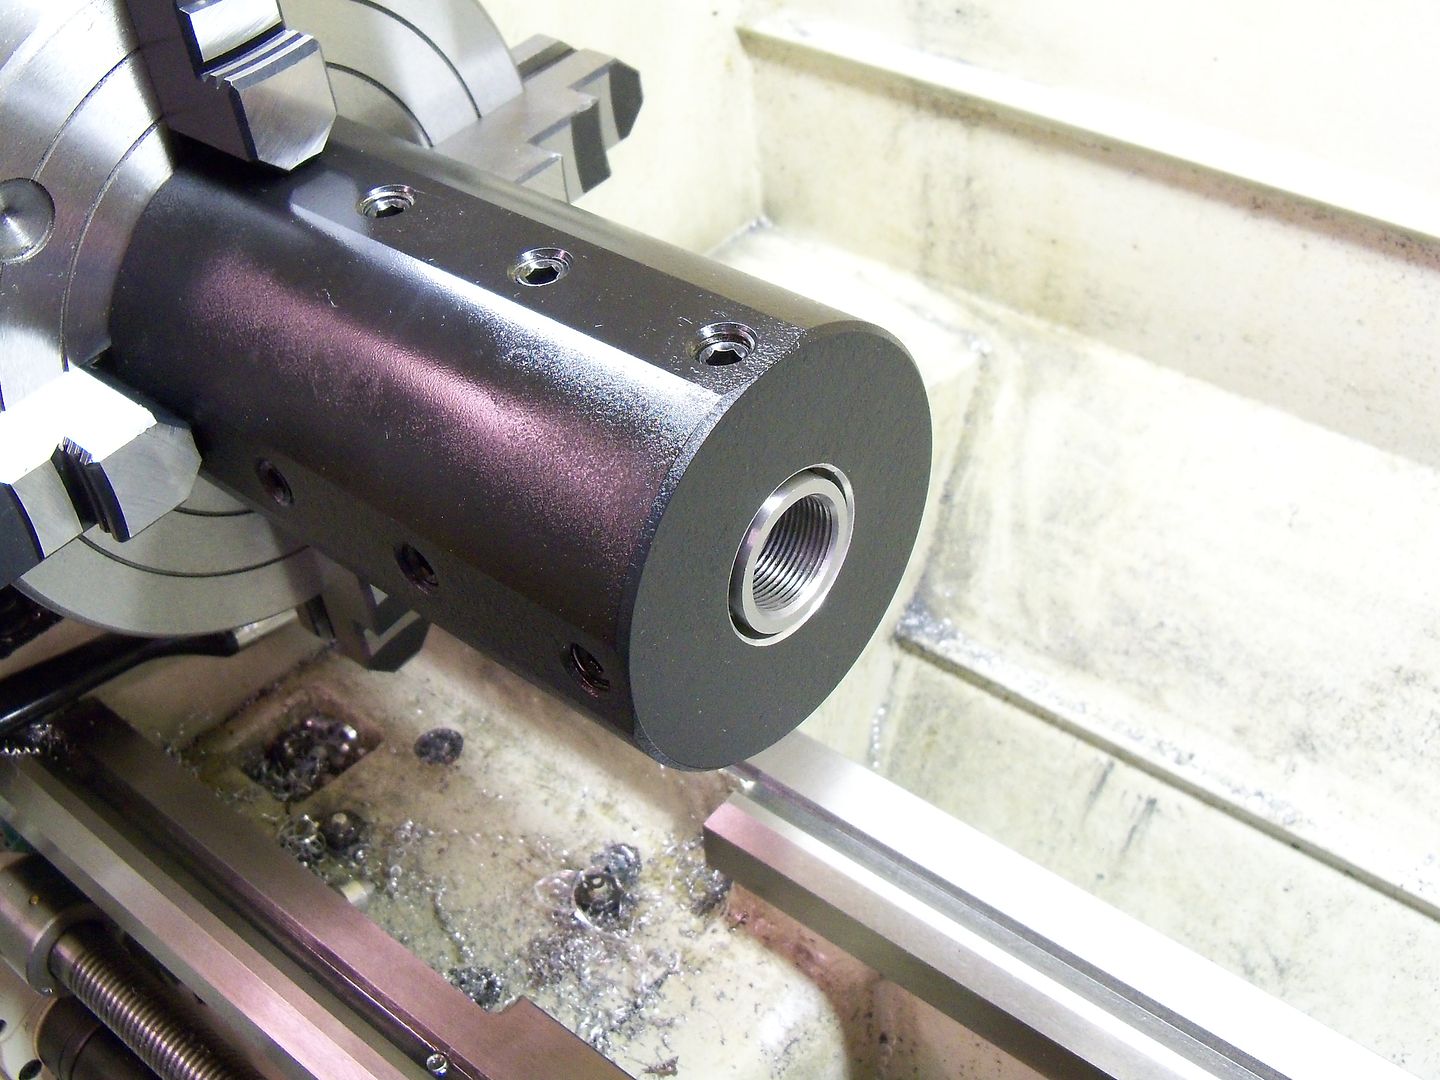
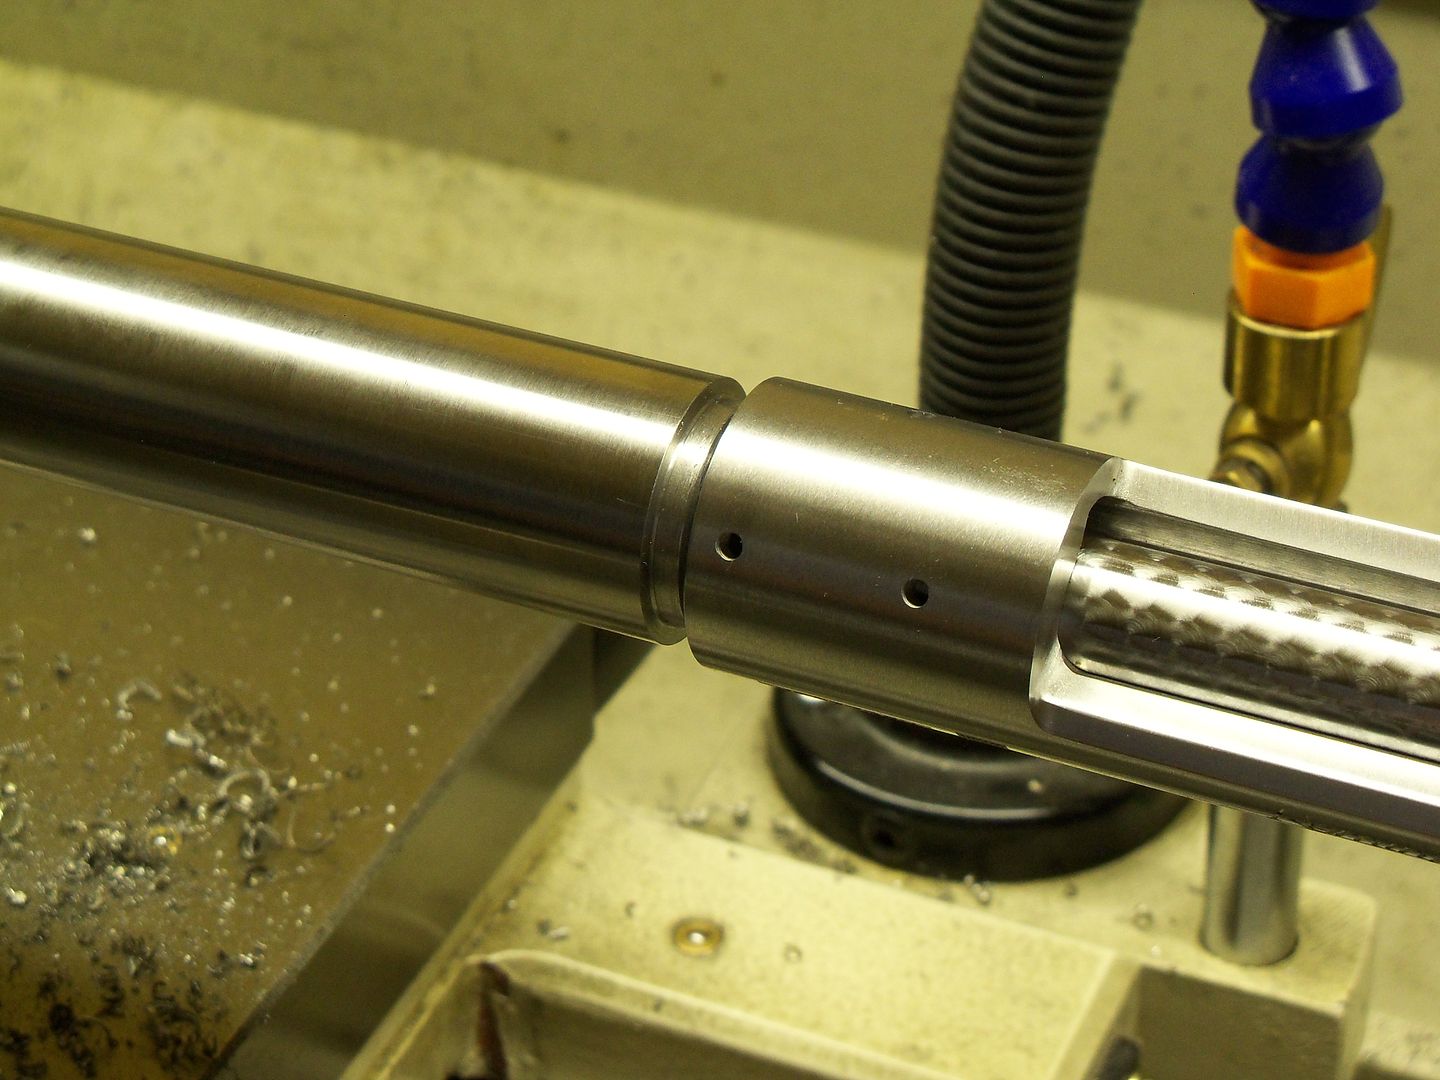
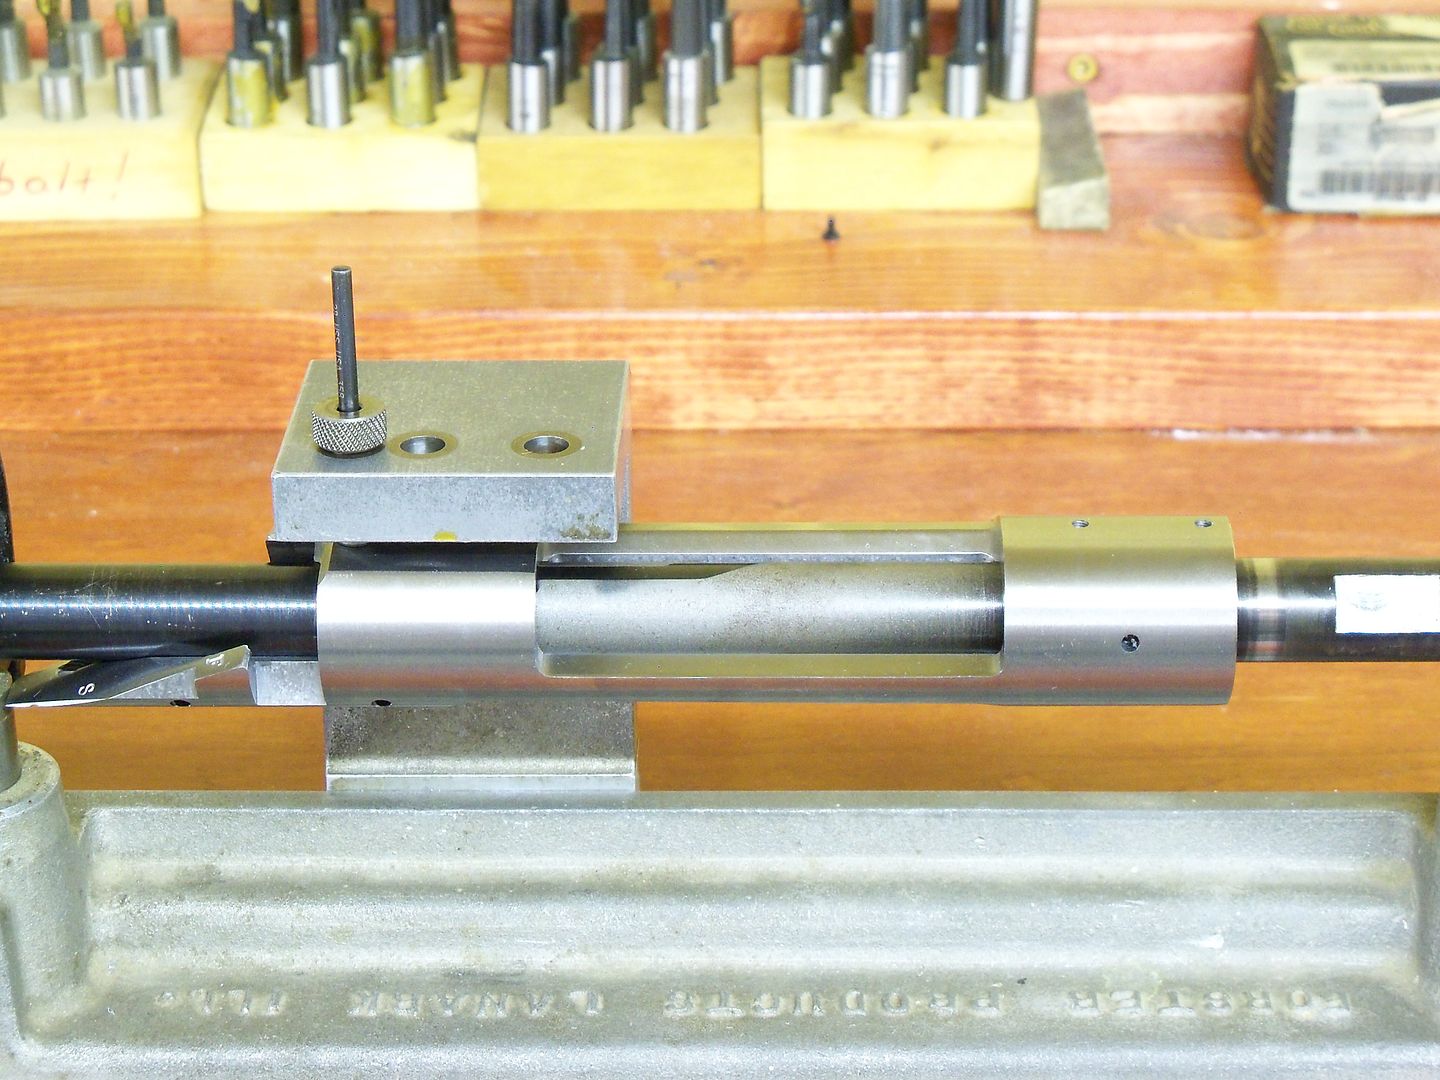
#2: Re: Building a long-range rifle in 300 Jr. Author: Vince, Location: Brisbane AUSTRALIAPosted: Sun May 27, 2018 4:15 am ---- Once my gauge was set up, the chamber end of the barrel was dialed in at two different points. One point was at the breech face, and the second point was 3 inches inside the bore. The barrel was dialed in, in a 4 jaw chuck, and a spider was used on the outboard end of the lathe to help keep everything in perfect alignment, and to keep the muzzle end of the barrel from flopping around. Once everything was dialed in to my satisfaction, the dial gauge did not even quiver when the barrel was spun at 200 or 700 rmp...
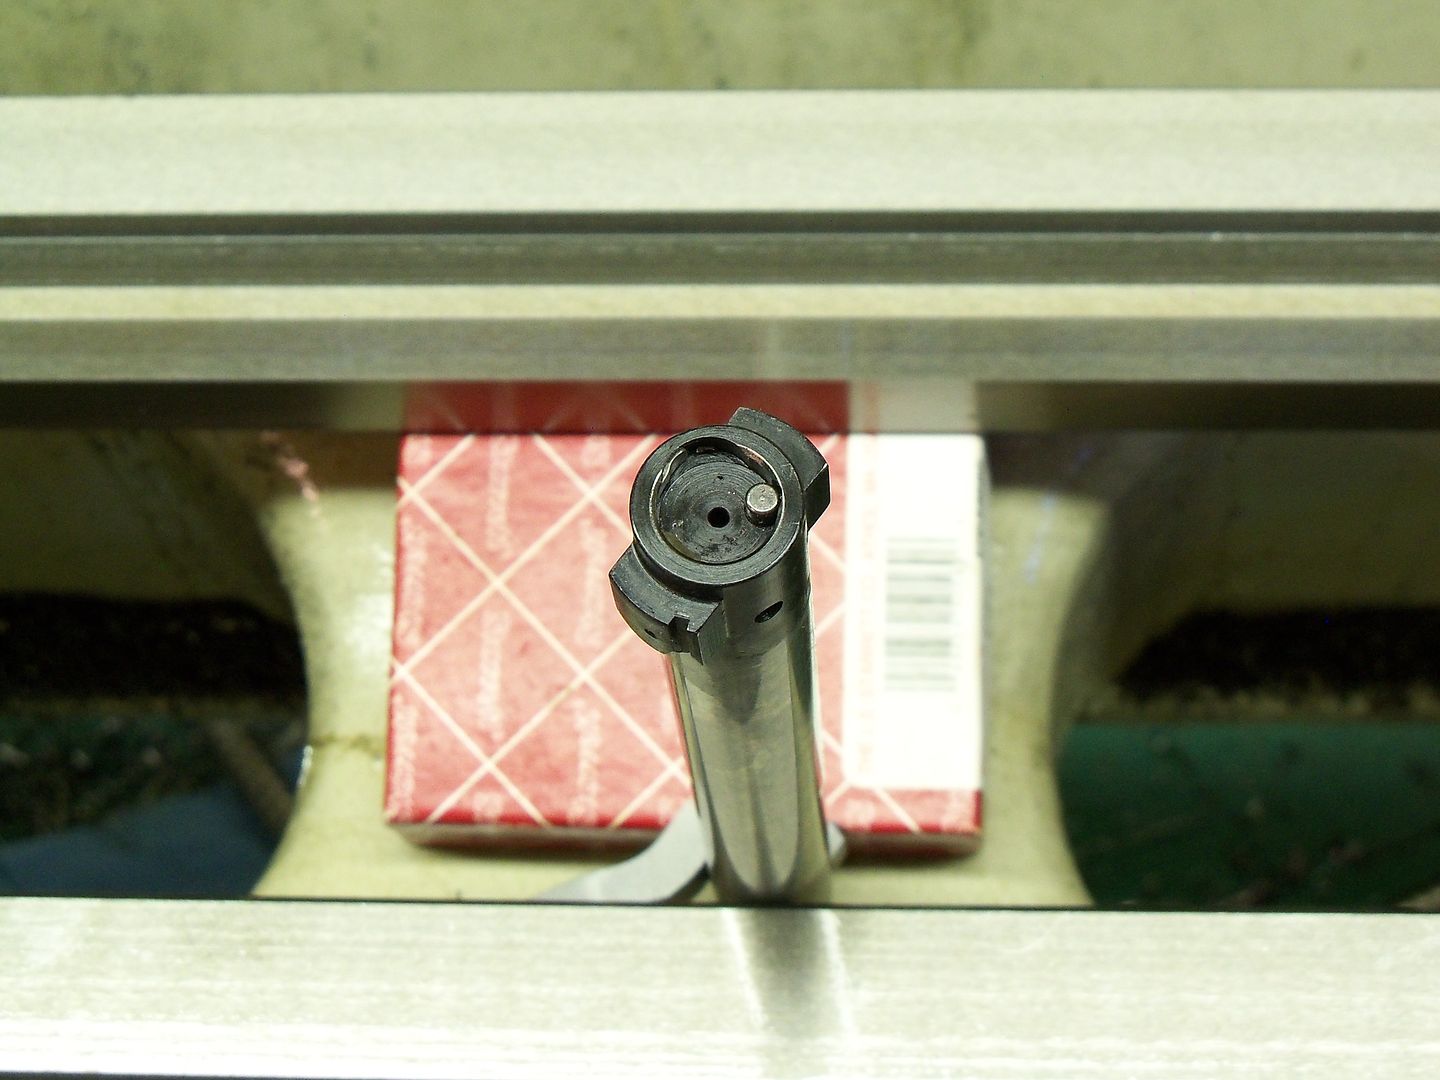
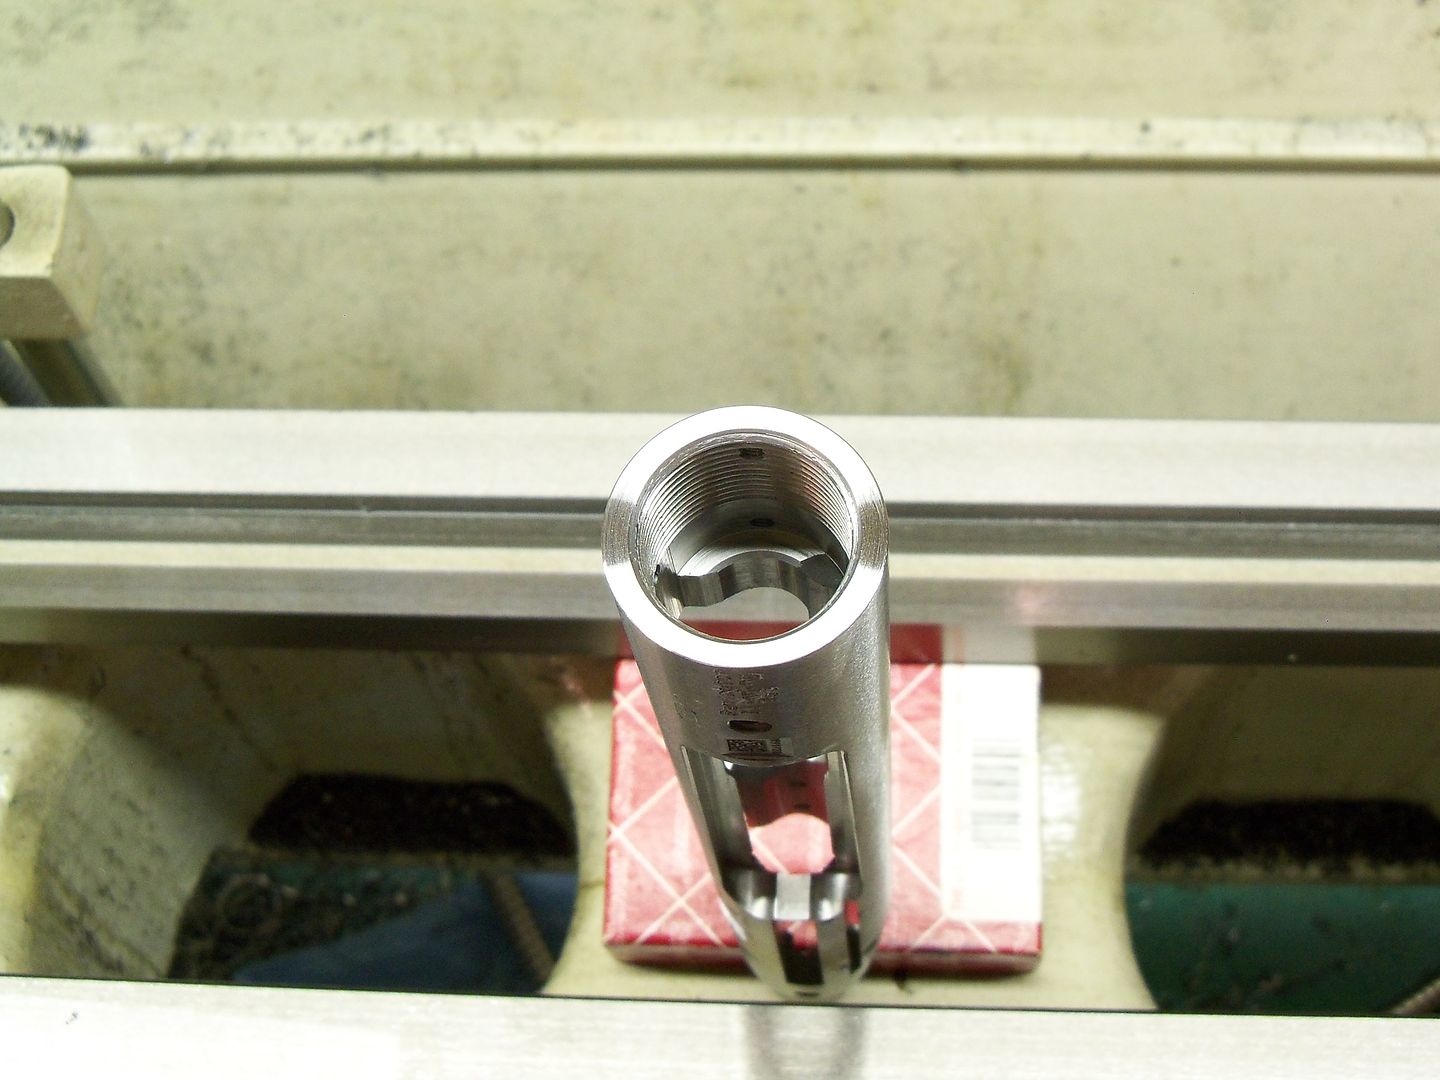
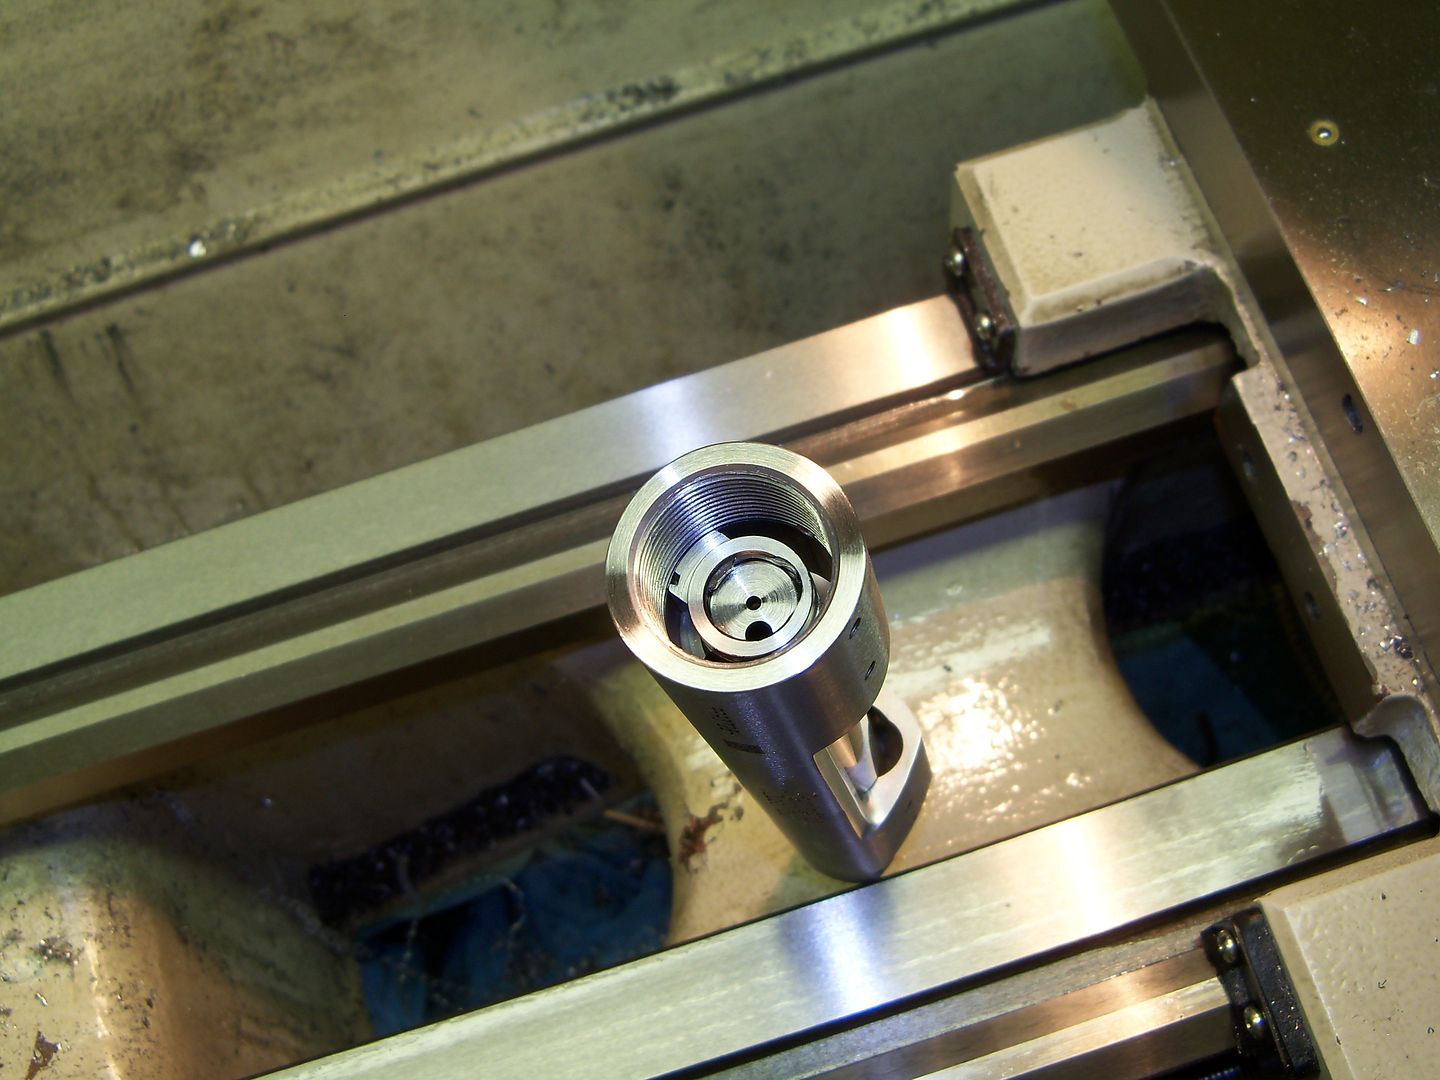
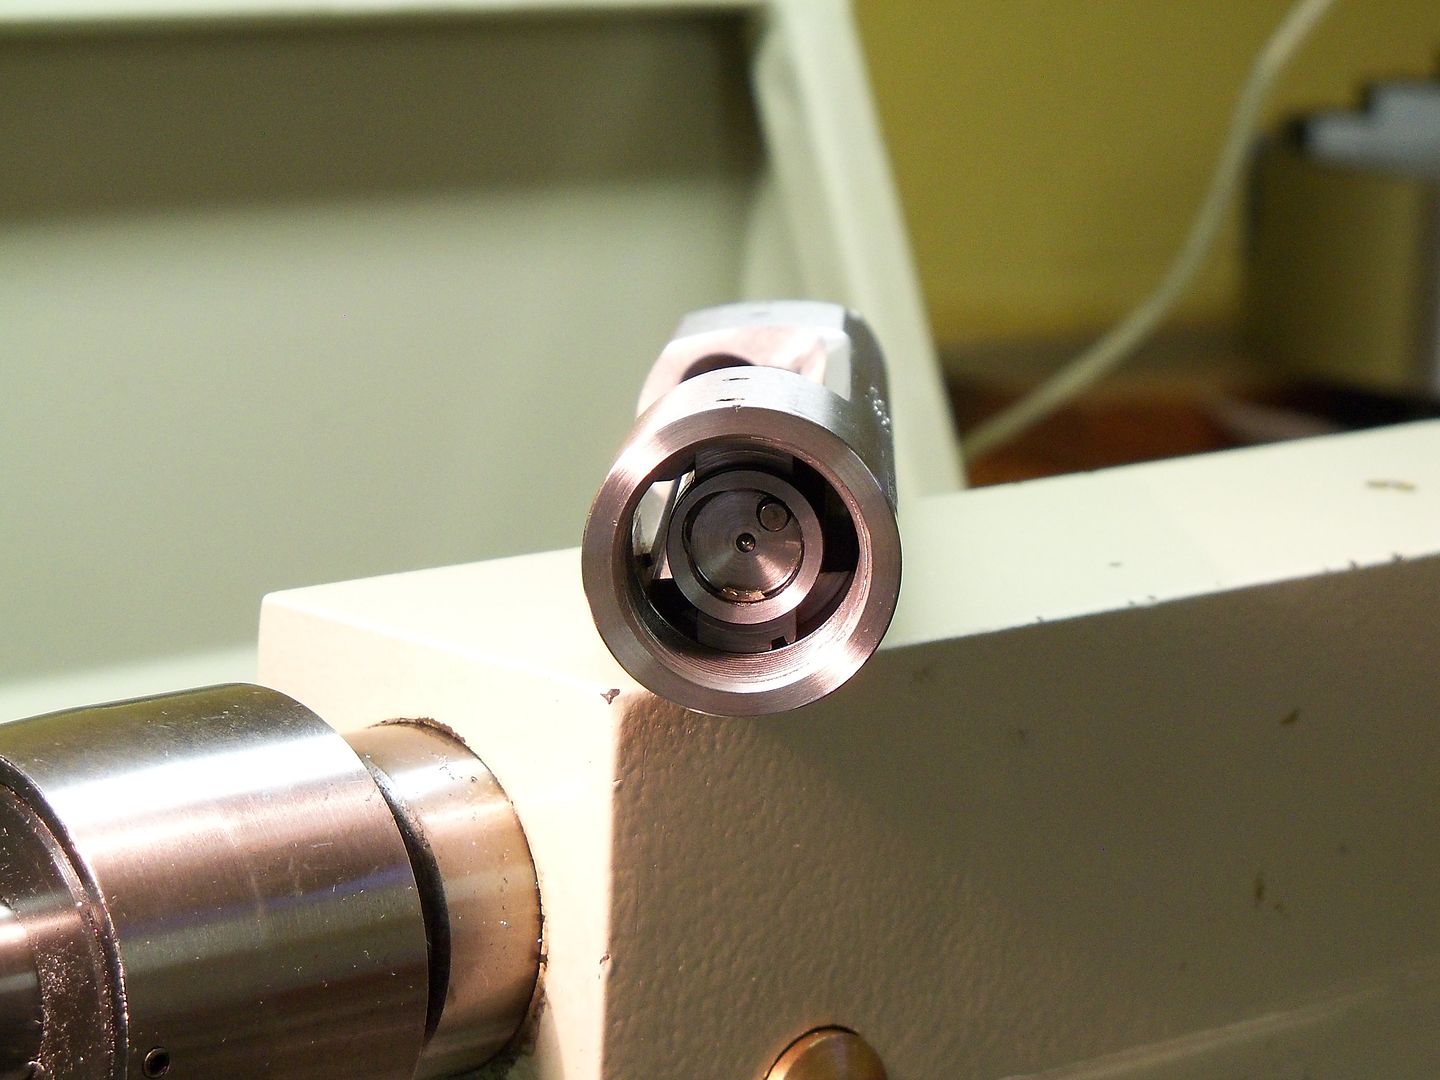
I used a boring bar to cut the bolt recess in the barrel, and started roughing in the chamber...
Last edited by Vince on Sun May 27, 2018 4:21 am; edited 1 time in total
#3: Re: Building a long-range rifle in 300 Jr. Author: Vince, Location: Brisbane AUSTRALIAPosted: Sun May 27, 2018 4:17 am ---- I'll post more pictures of the build as it progresses...
I finished cutting the chamber today, and started blue printing the action. I'll get back on it Monday, and try to post a couple more pictures that night...
Last edited by Vince on Sun May 27, 2018 4:22 am; edited 1 time in total
#4: Re: Building a long-range rifle in 300 Jr. Author: Vince, Location: Brisbane AUSTRALIAPosted: Sun May 27, 2018 4:18 am ---- I am on a late lunch break, so I though I would stop by for a minute or two...
I appreciate the kind words from you guy, and I am very humbled by them. Thank you again...
Blue printing basically makes a $400 mass produced action comparable to a $1,200 custom action. With factory actions being mass produced, they need a lot of attention to make them like what they should have had in the first place.
The face of the action is trued to the centerline of the action, so when a barrel is installed, the chamber will be in perfect alignment with bolt face, and the barrel will sit centered in a stock, instead of being cocked to one side or another...
The bolt face is cut true, so there will be 100% contact with the cartridge case head...
The circumference of the bolt nose is trued, as well as the outer diameter and front of the locking lugs. This all allows for a more precise fit of the barrel when it is screwed onto the action...
The back of the barrel lugs are recut then lapped to there is a minimum of 80% contact between the bolt and the action. This keeps the bolt from being cocker off to one side when the gun is fired...
All of these improvements help the gun to achieve it's highest accuracy potential. Of course this is also dependent upon the shooters skills and his ability at the loading bench...
No matter how precise I build a gun, if the one behind the trigger does not know what he is doing, then nothing I can do is going to help...
On the other hand though, put one of my rifles in the hands of a man that knows how to shoot, reload and is very dedicated, then things get very interesting very fast. An accurate rifle with a man that knows to use it, is a sight to behold!
#5: Re: Building a long-range rifle in 300 Jr. Author: Vince, Location: Brisbane AUSTRALIAPosted: Sun May 27, 2018 4:18 am ---- My computer and photobucket have both been going nuts, so please bare with me. Since I am having so much trouble posting pictures, I'll post what I can and if you have any questions, just ask!
Last edited by Vince on Sun May 27, 2018 4:22 am; edited 1 time in total
#6: Re: Building a long-range rifle in 300 Jr. Author: Vince, Location: Brisbane AUSTRALIAPosted: Sun May 27, 2018 4:20 am ---- Thanks again for the compliments guys, I appreciate the kind words...
A little more information on the barrel, since I have asked about it several times.
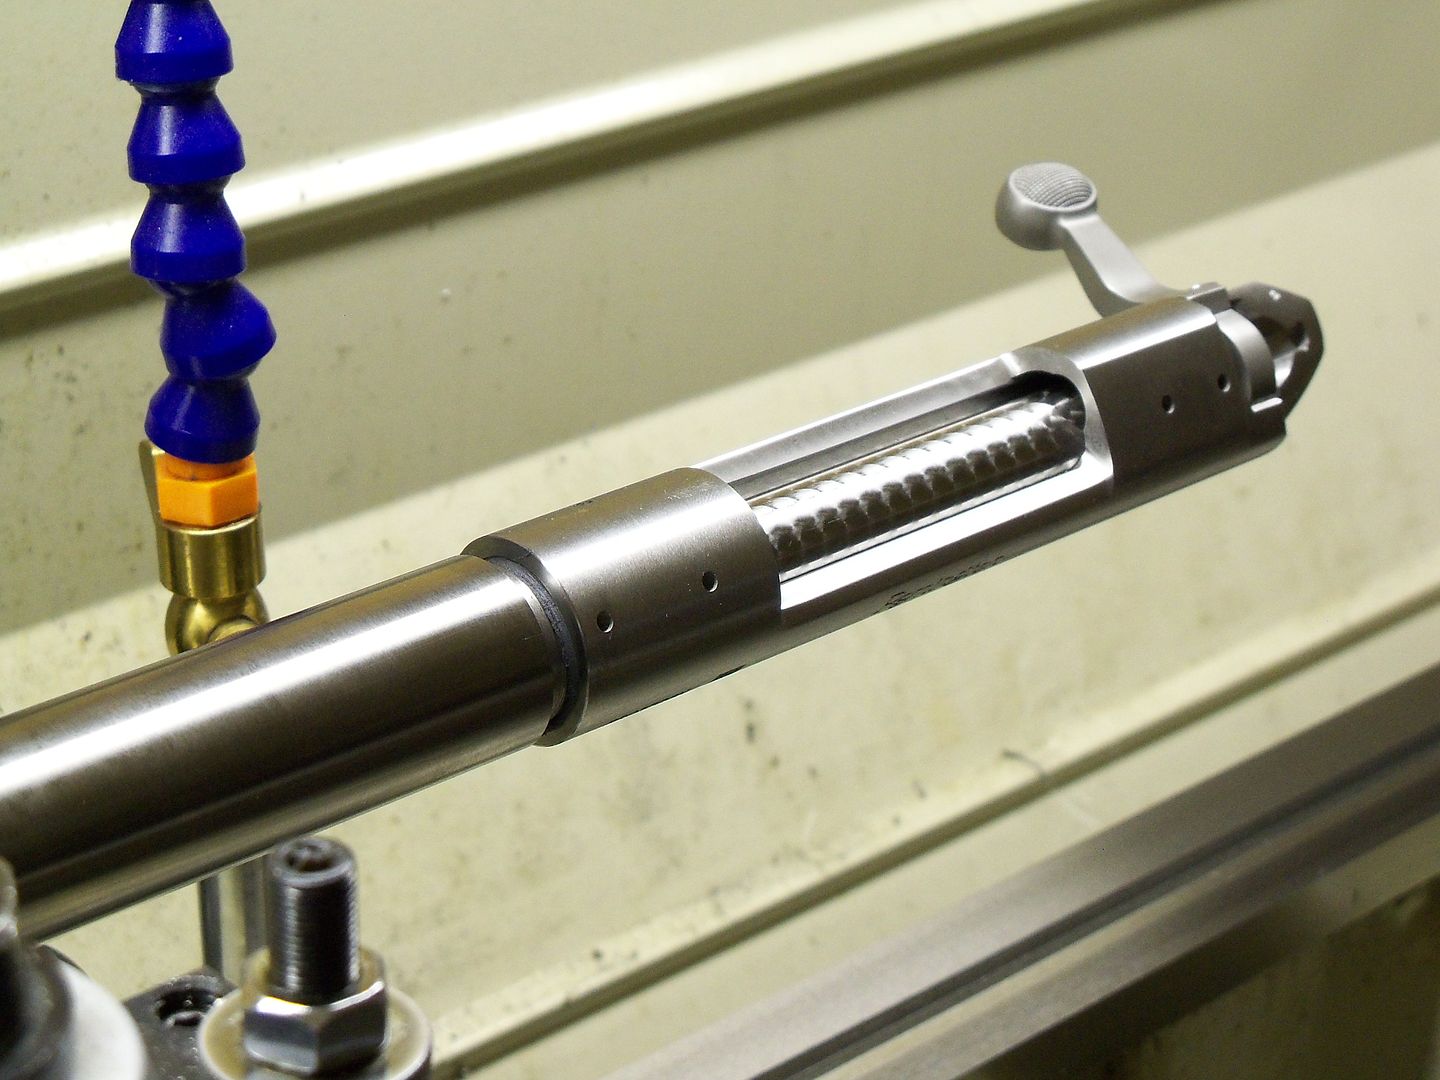
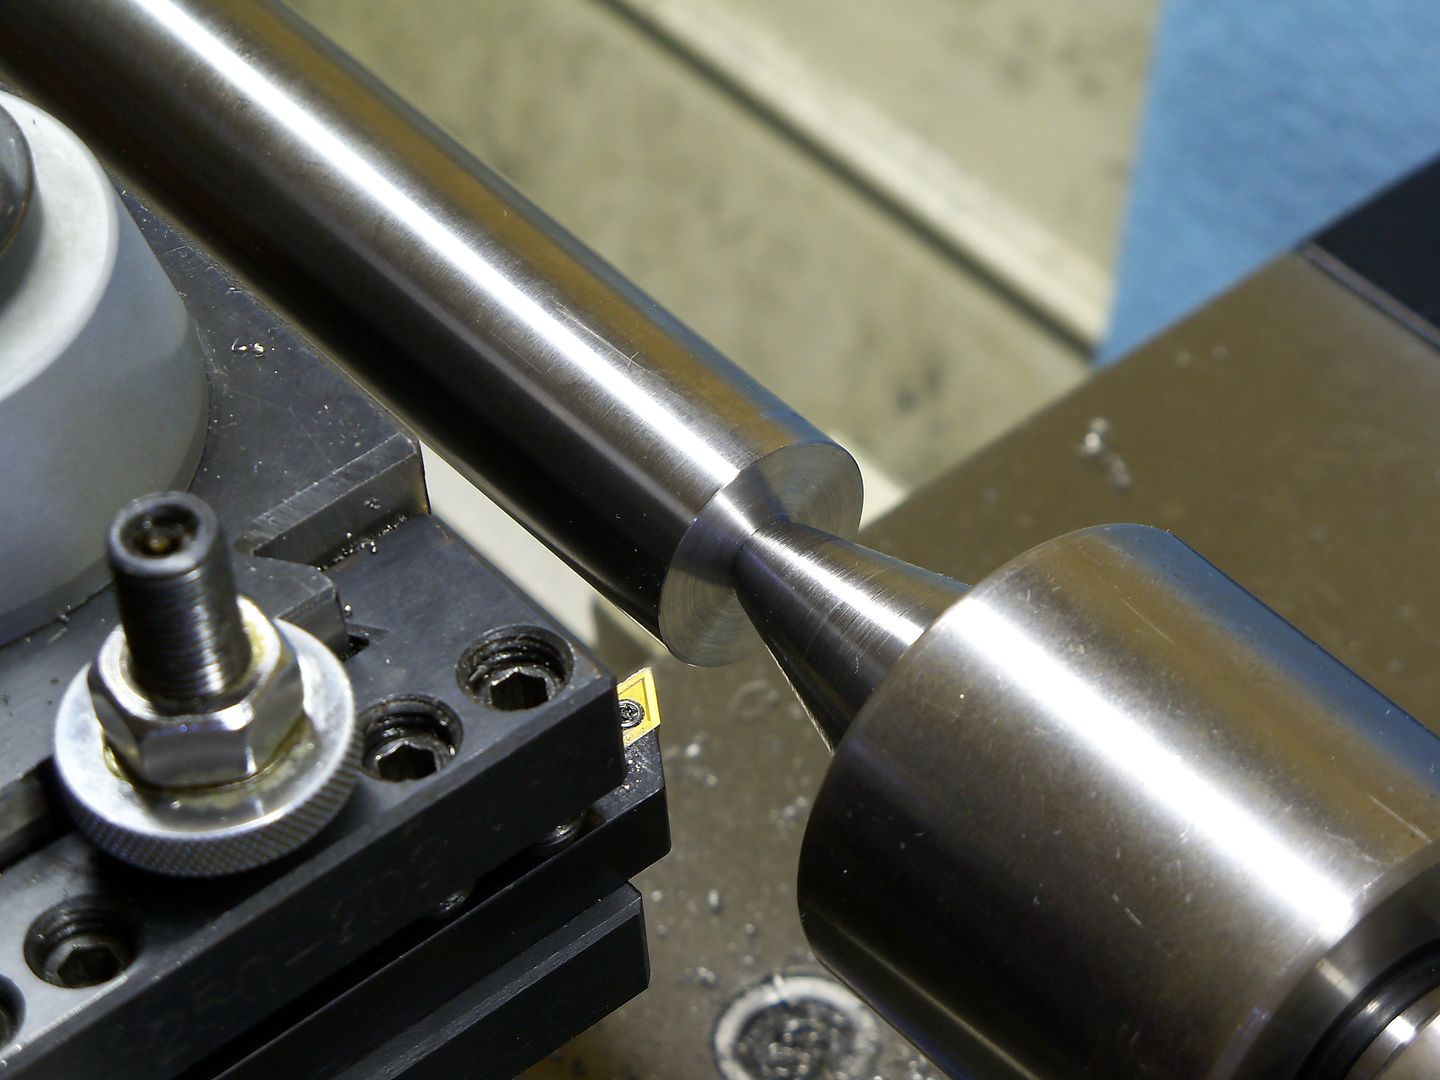
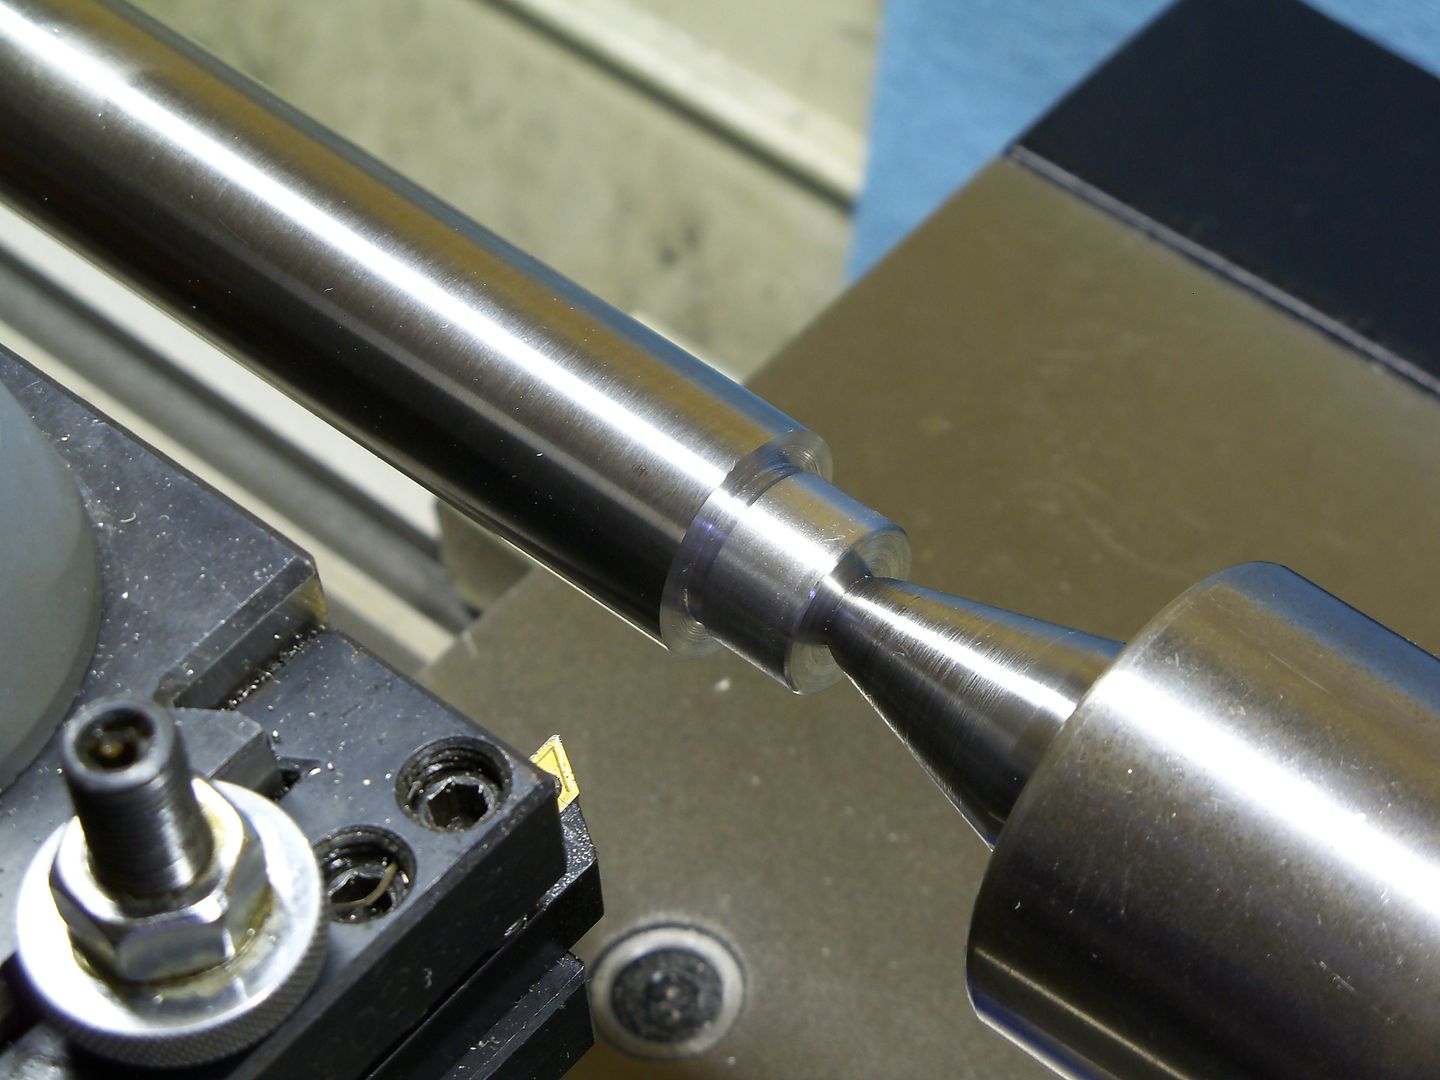
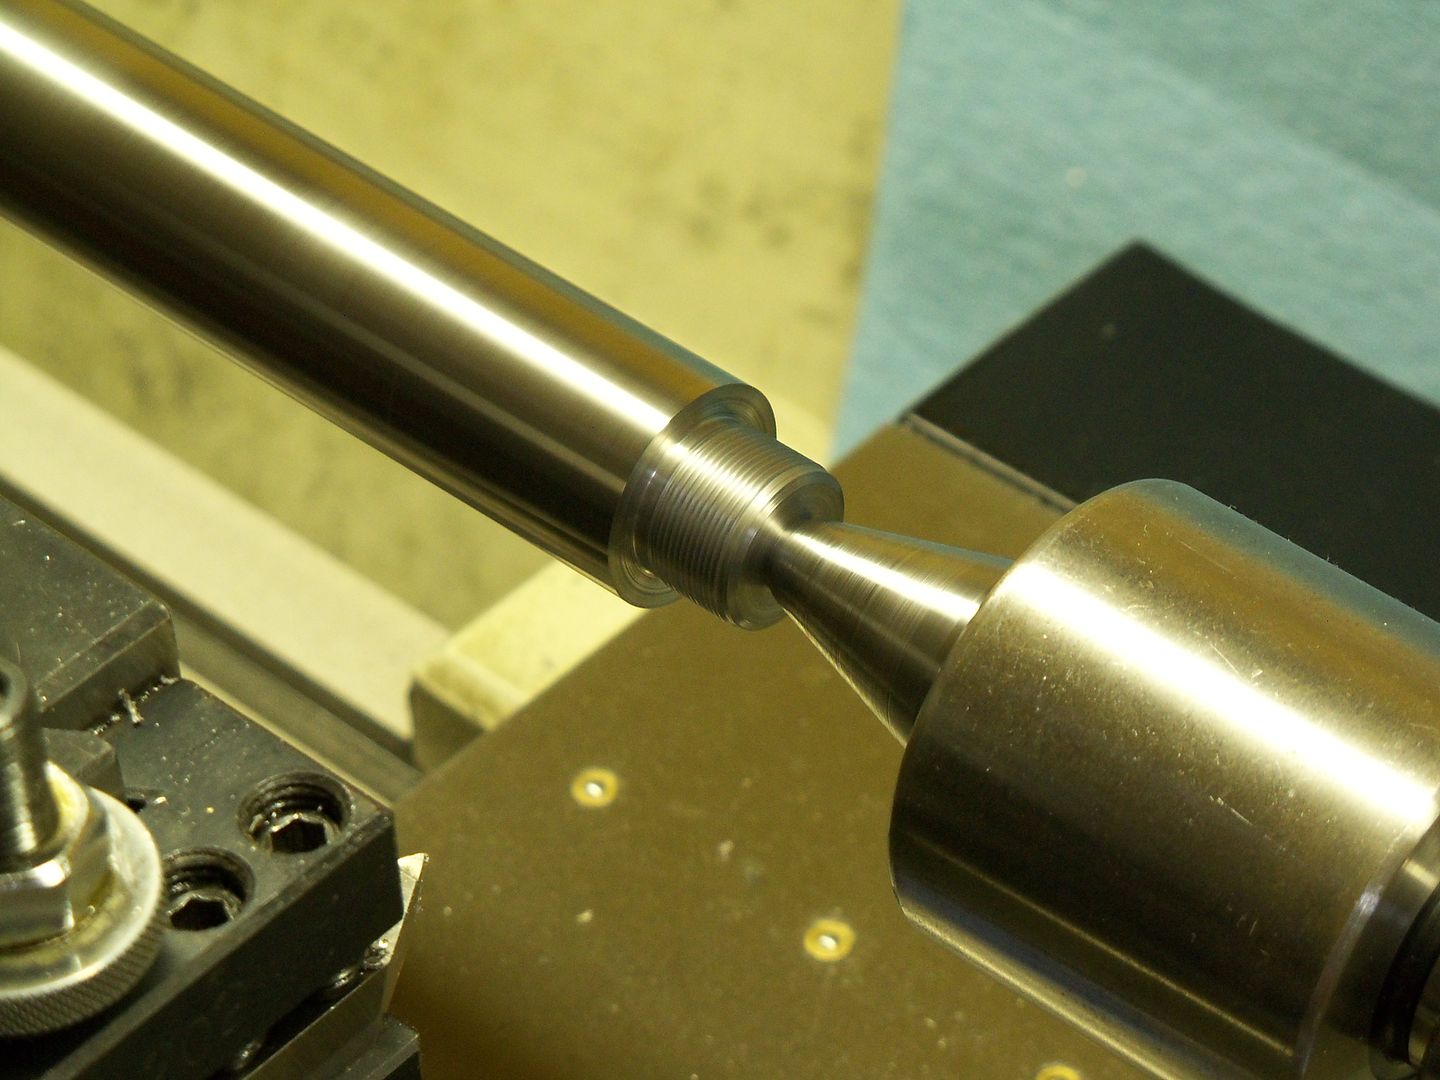
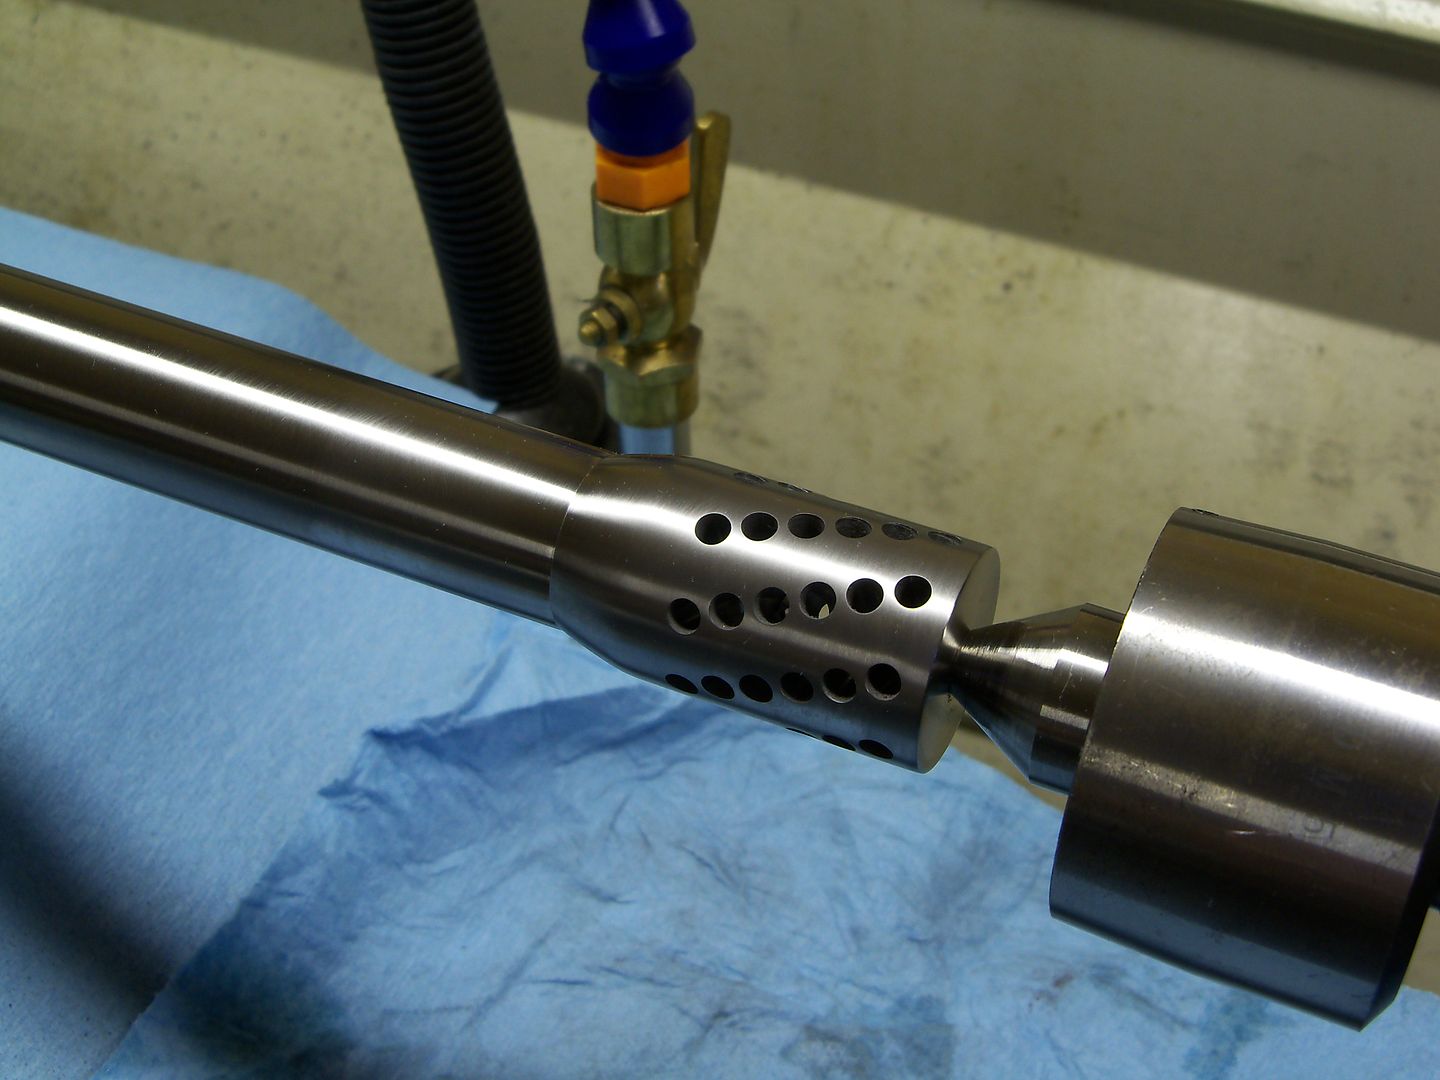
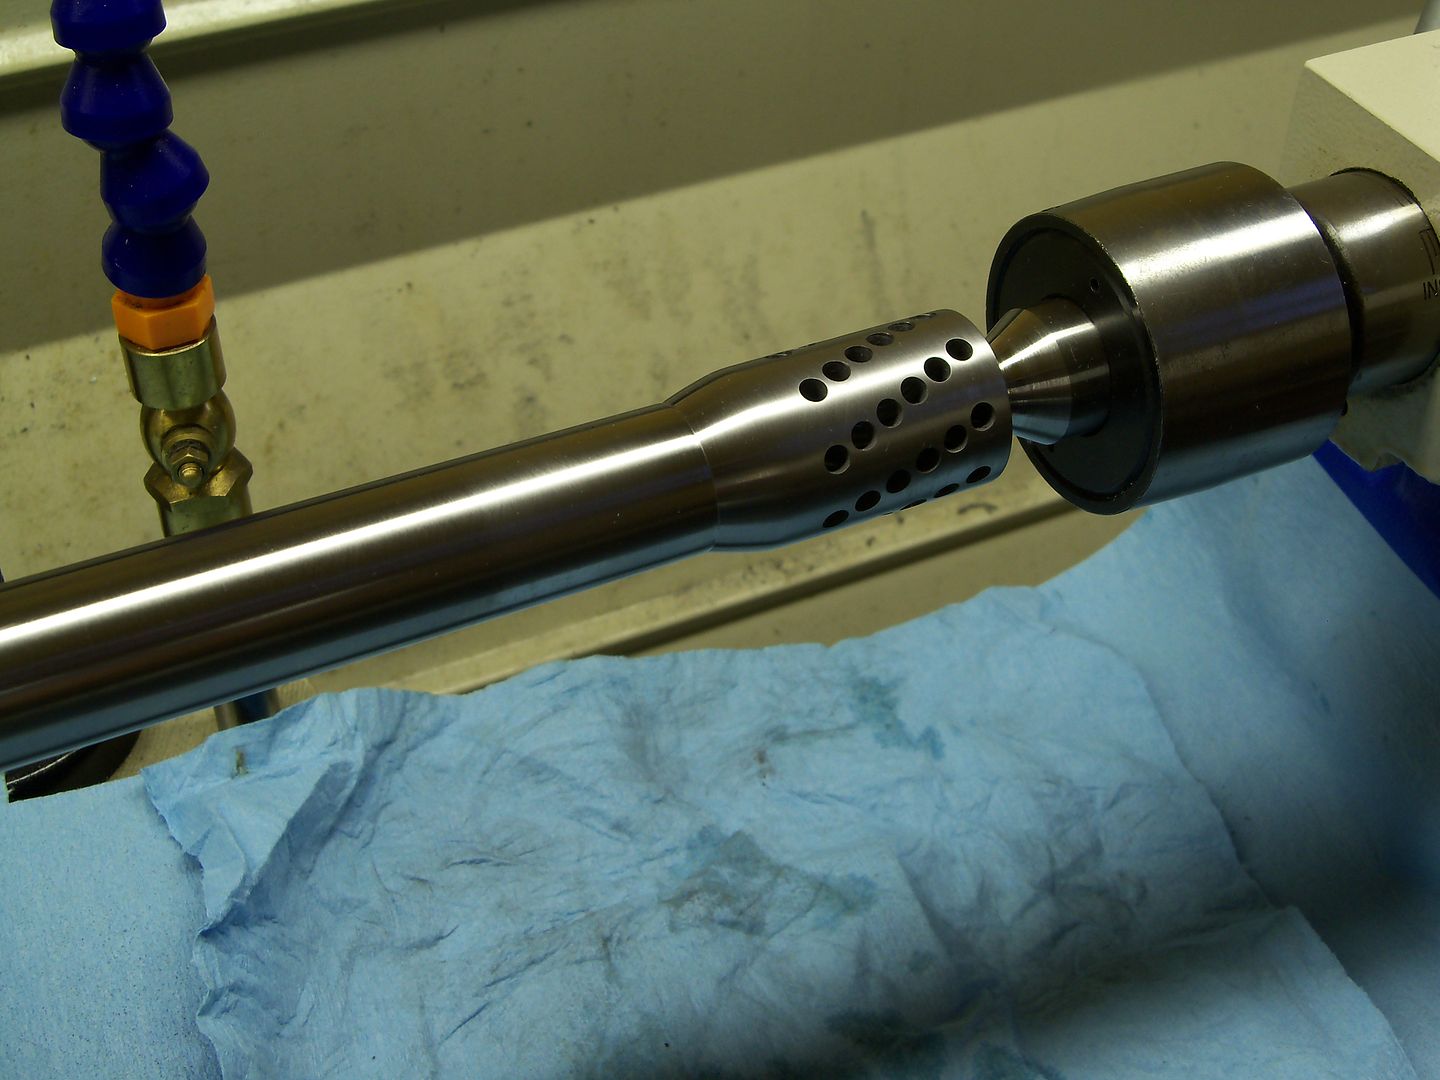
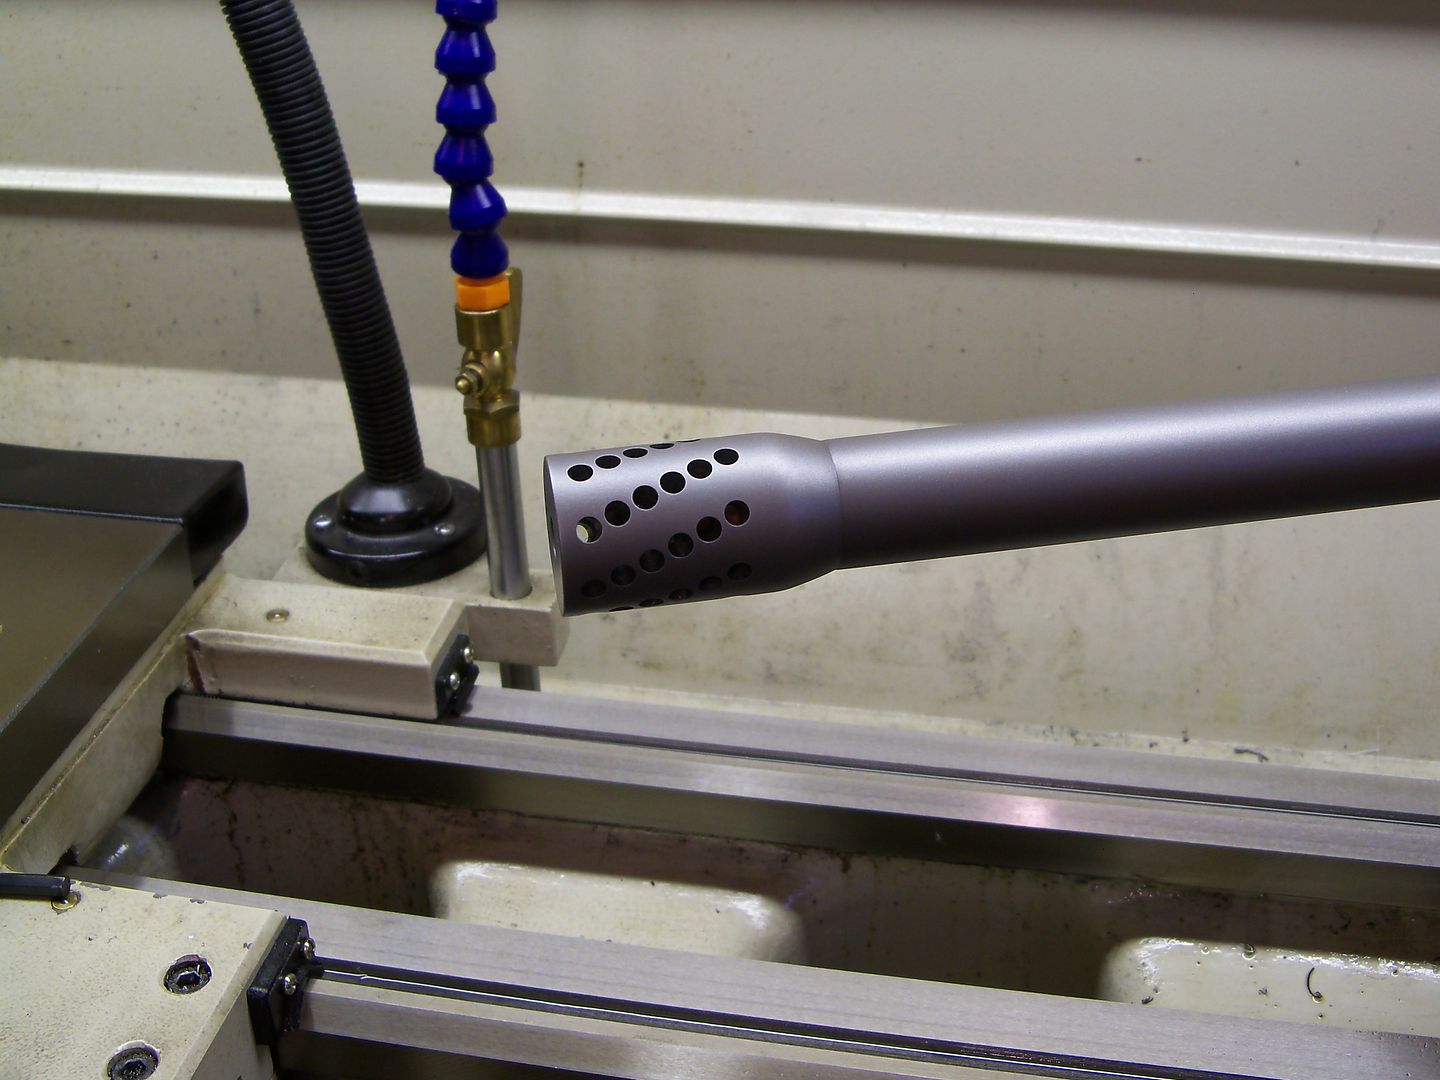
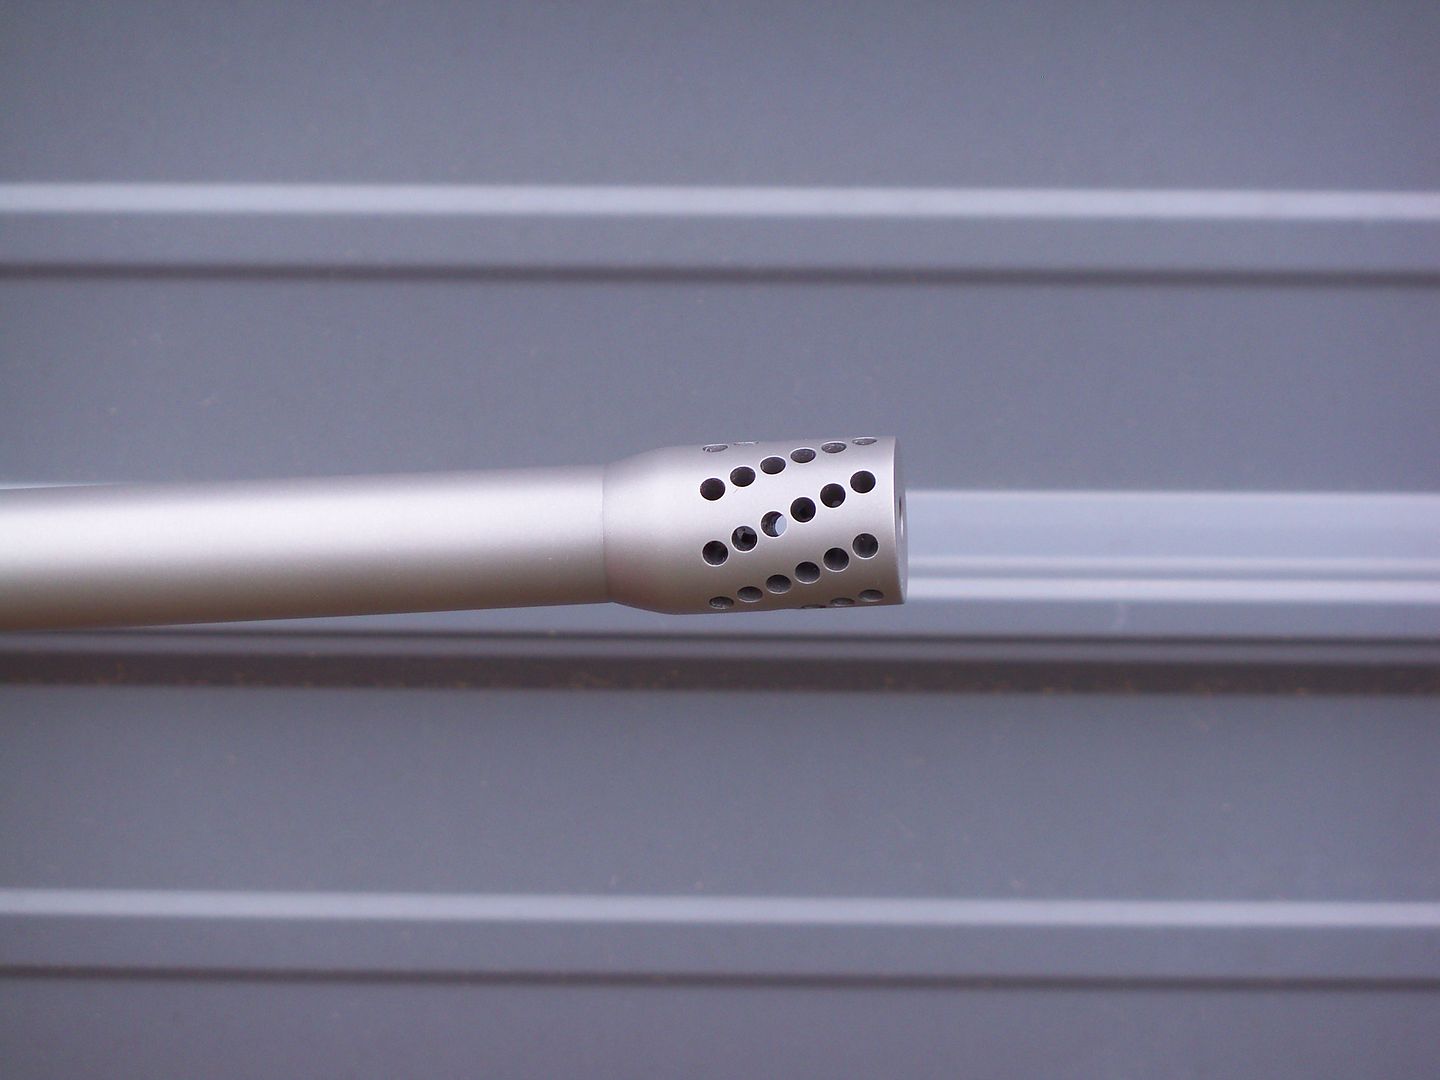
It is a Bartlein barrel, stainless steel, 5R rifling, the breech end is 1.250" for 5 inches, then it tapers down to 1.00" at the muzzle at 32". The barrel will be cut to 30" and I'll add one of my muzzle brakes, making the overall length 31 1/2"...
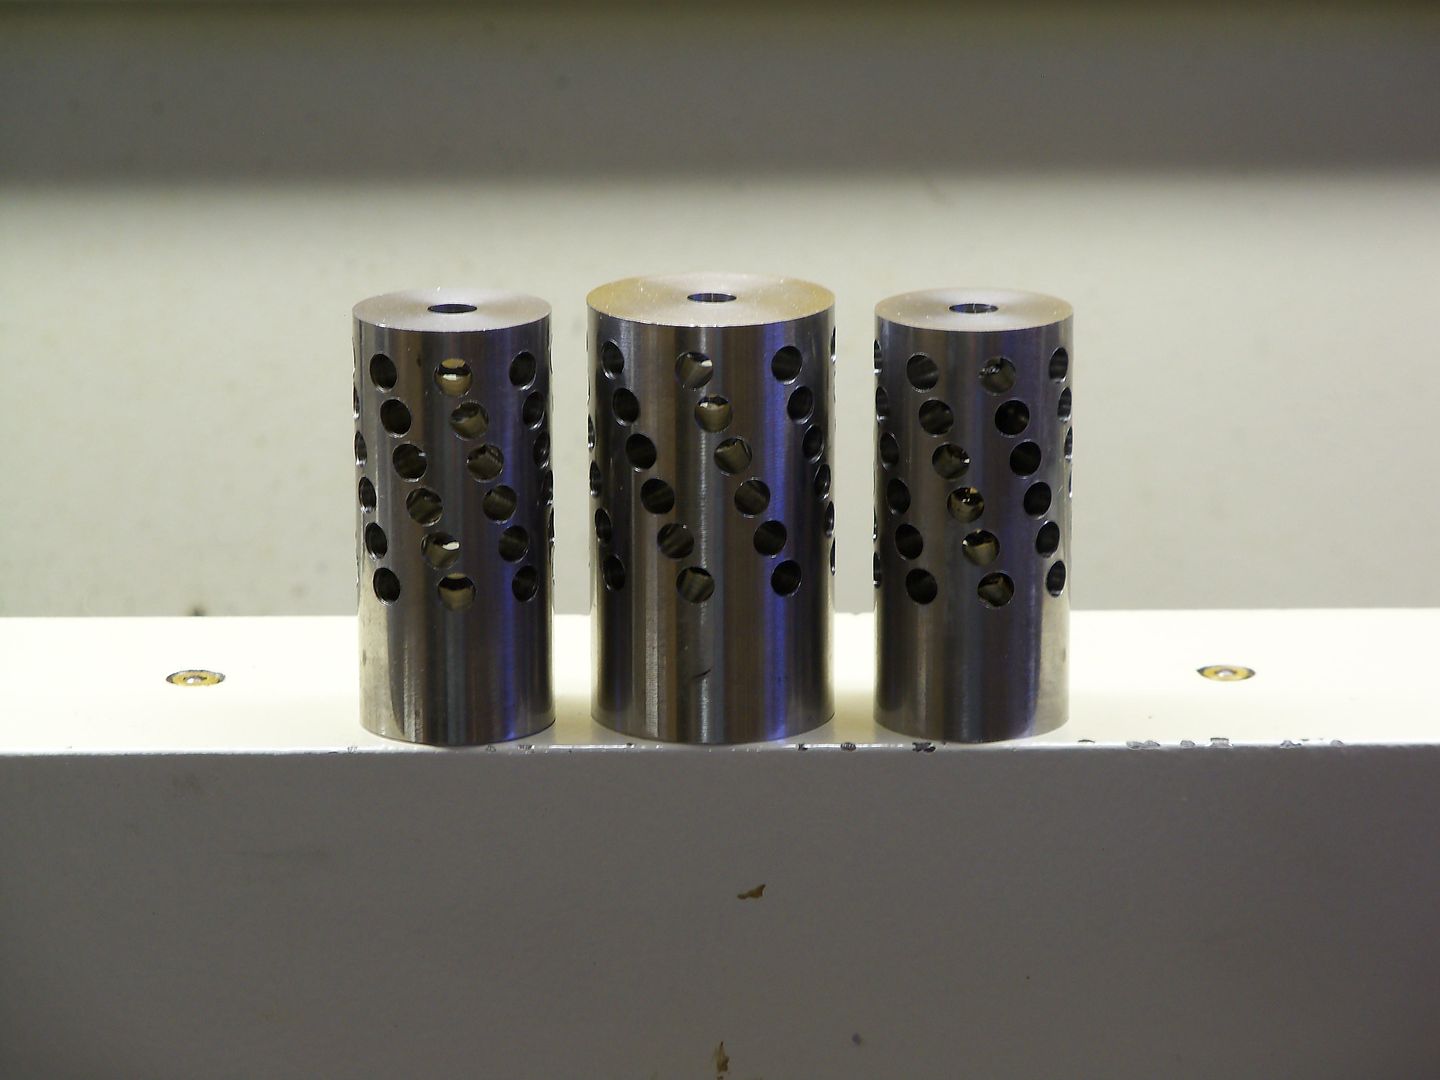
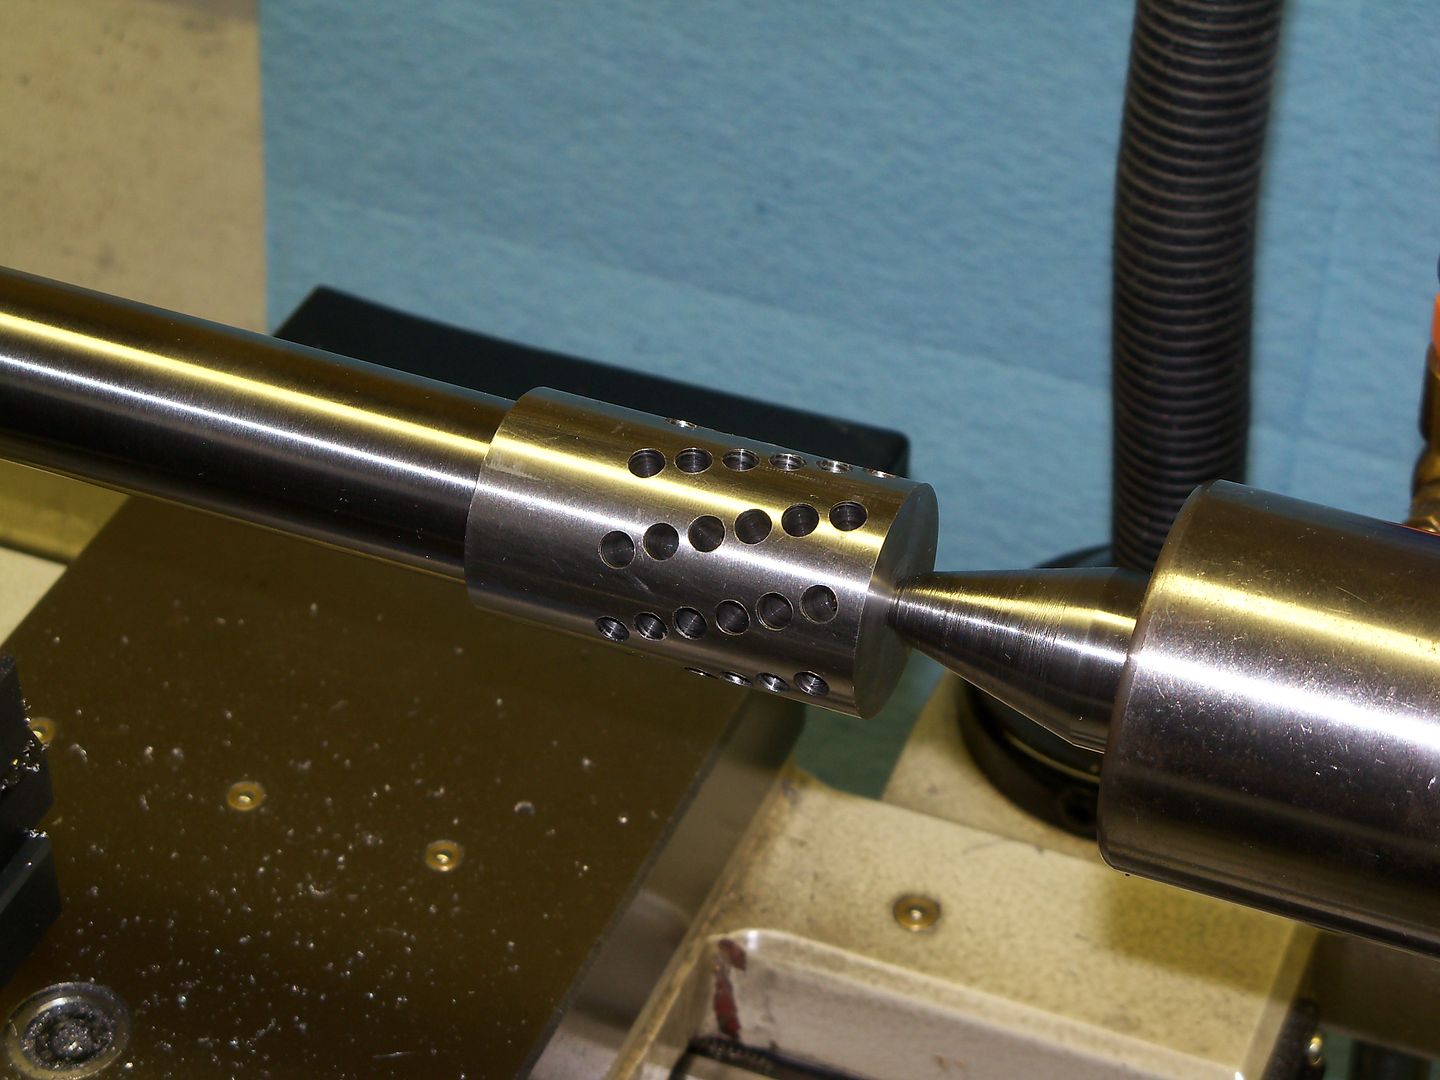
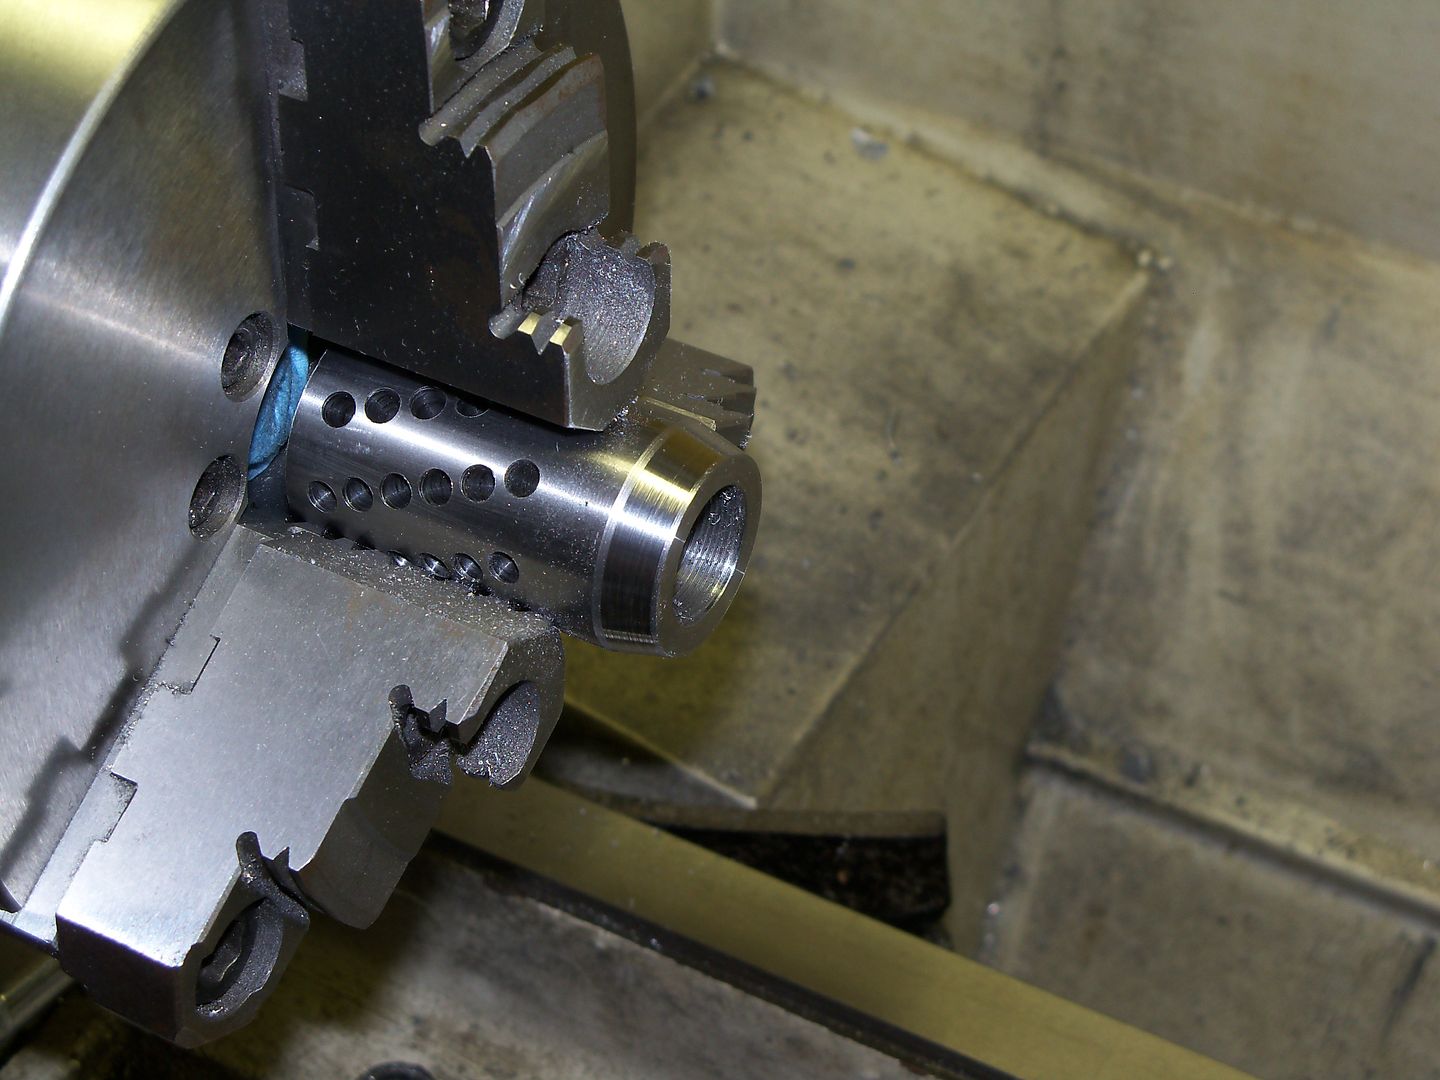
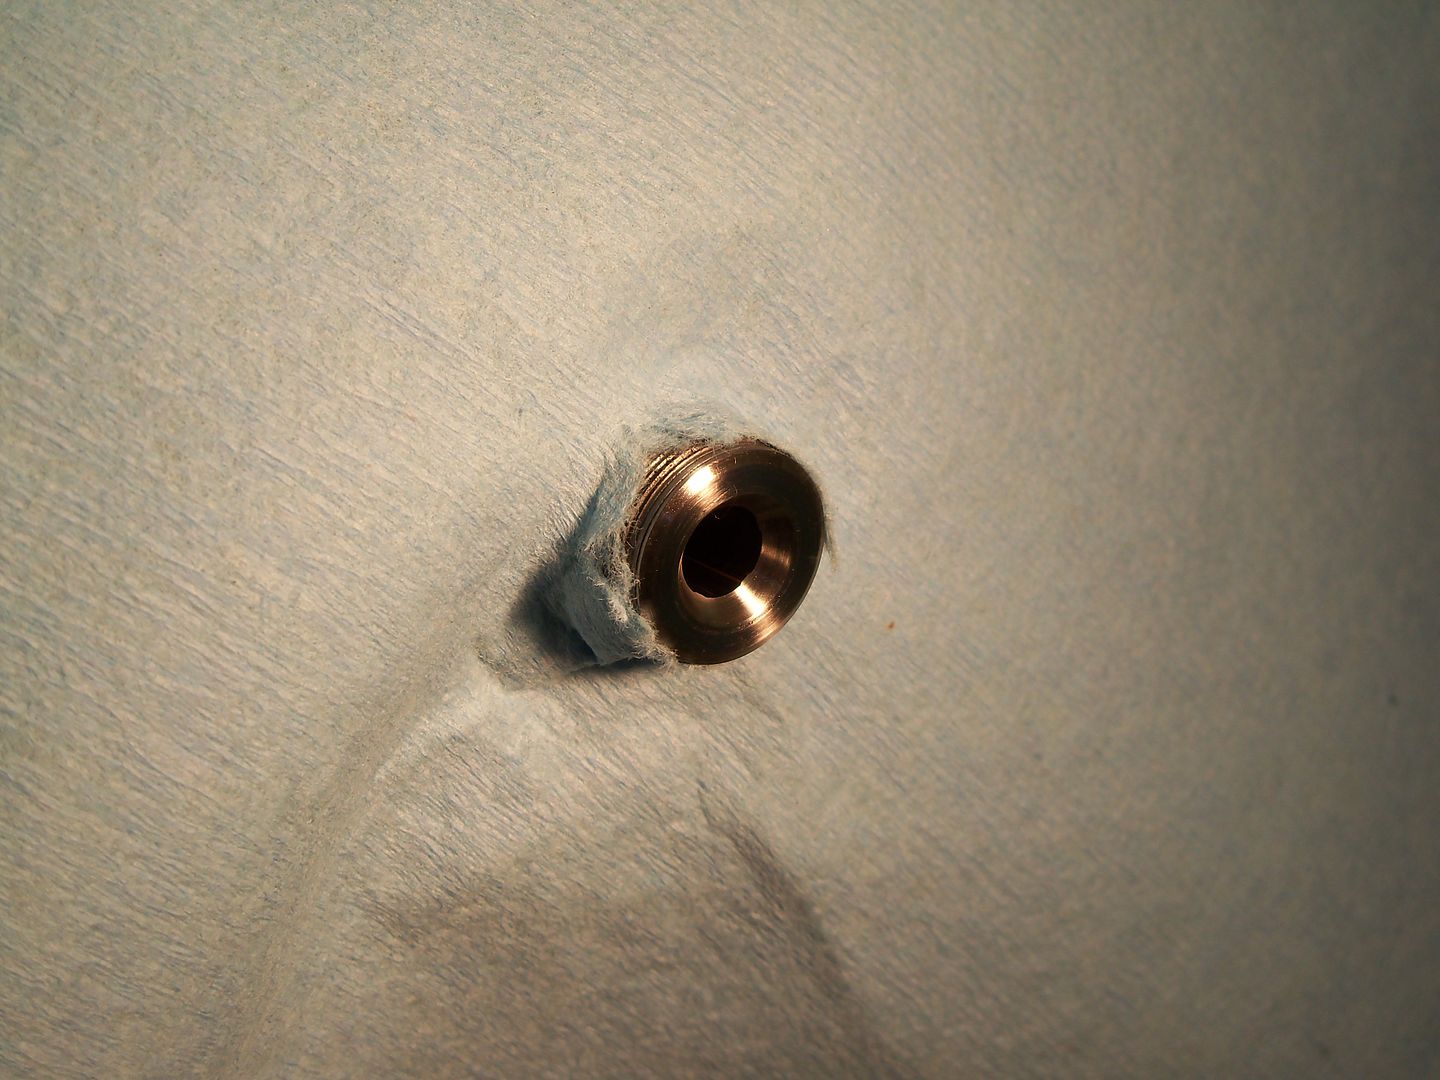
Customer requested that the muzzle brake be left oversize, and I just finished making a 1 1/4" diameter brake that will be threaded onto the barrel after I cut and crown it...
And the bi-pod, that is mine and does NOT go with the rifle...
If everything goes according to plan, I'll have more pictures first of next week...
#7: Re: Building a long-range rifle in 300 Jr. Author: Vince, Location: Brisbane AUSTRALIAPosted: Sun May 27, 2018 4:23 am ---- Before cutting the barrel and adding one of my muzzle brakes, I went and test fired the gun before proceeding any further.
I make hand dies for the 300 Jr., that I cut with the same reamer that I use to cut the chamber. The size die uses interchangeable neck bushings...
For bullet seating, the customer has the choice of using a Hornady .30 caliber universal bullet seater or a hand die that is cut with the same reamer, then have a micrometer bullet seater...
If you are interested in me building you a rifle chambered in 300 Jr, send me your address and I will send you a fireformed case...
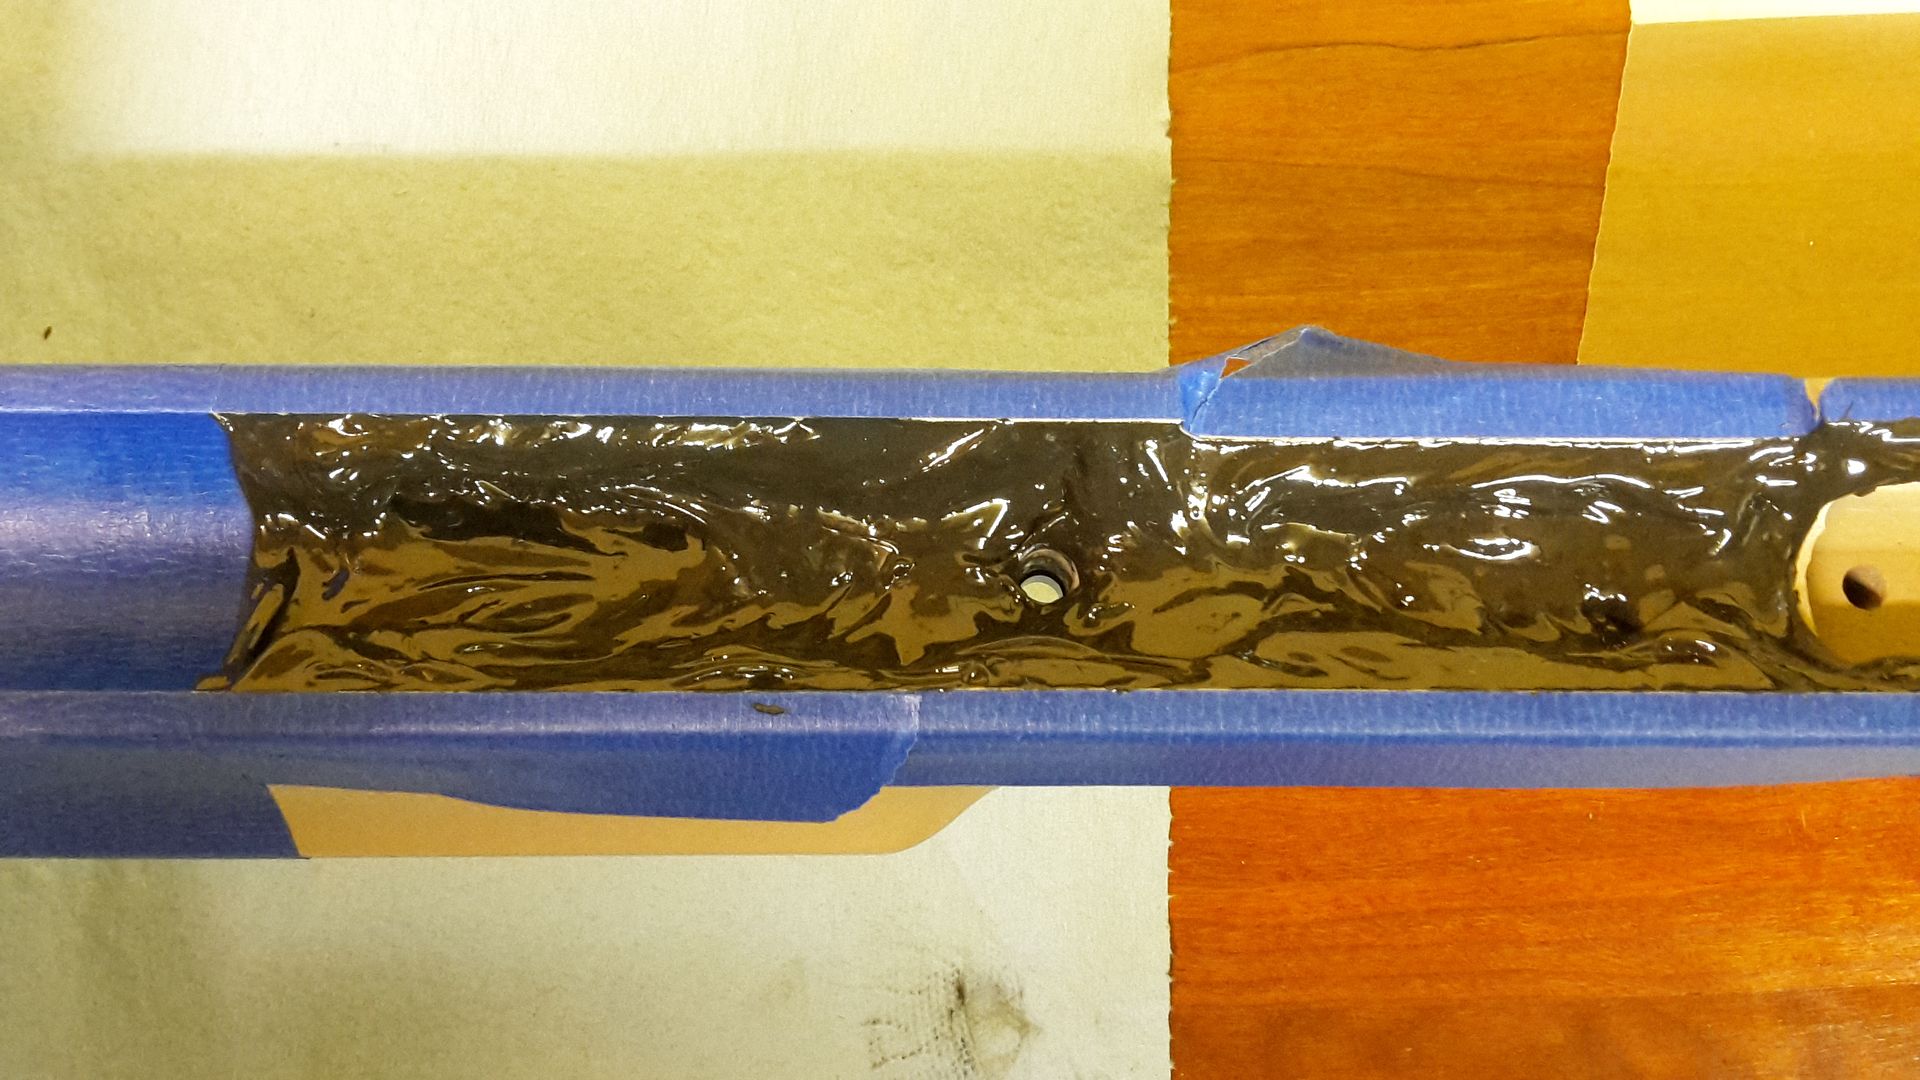
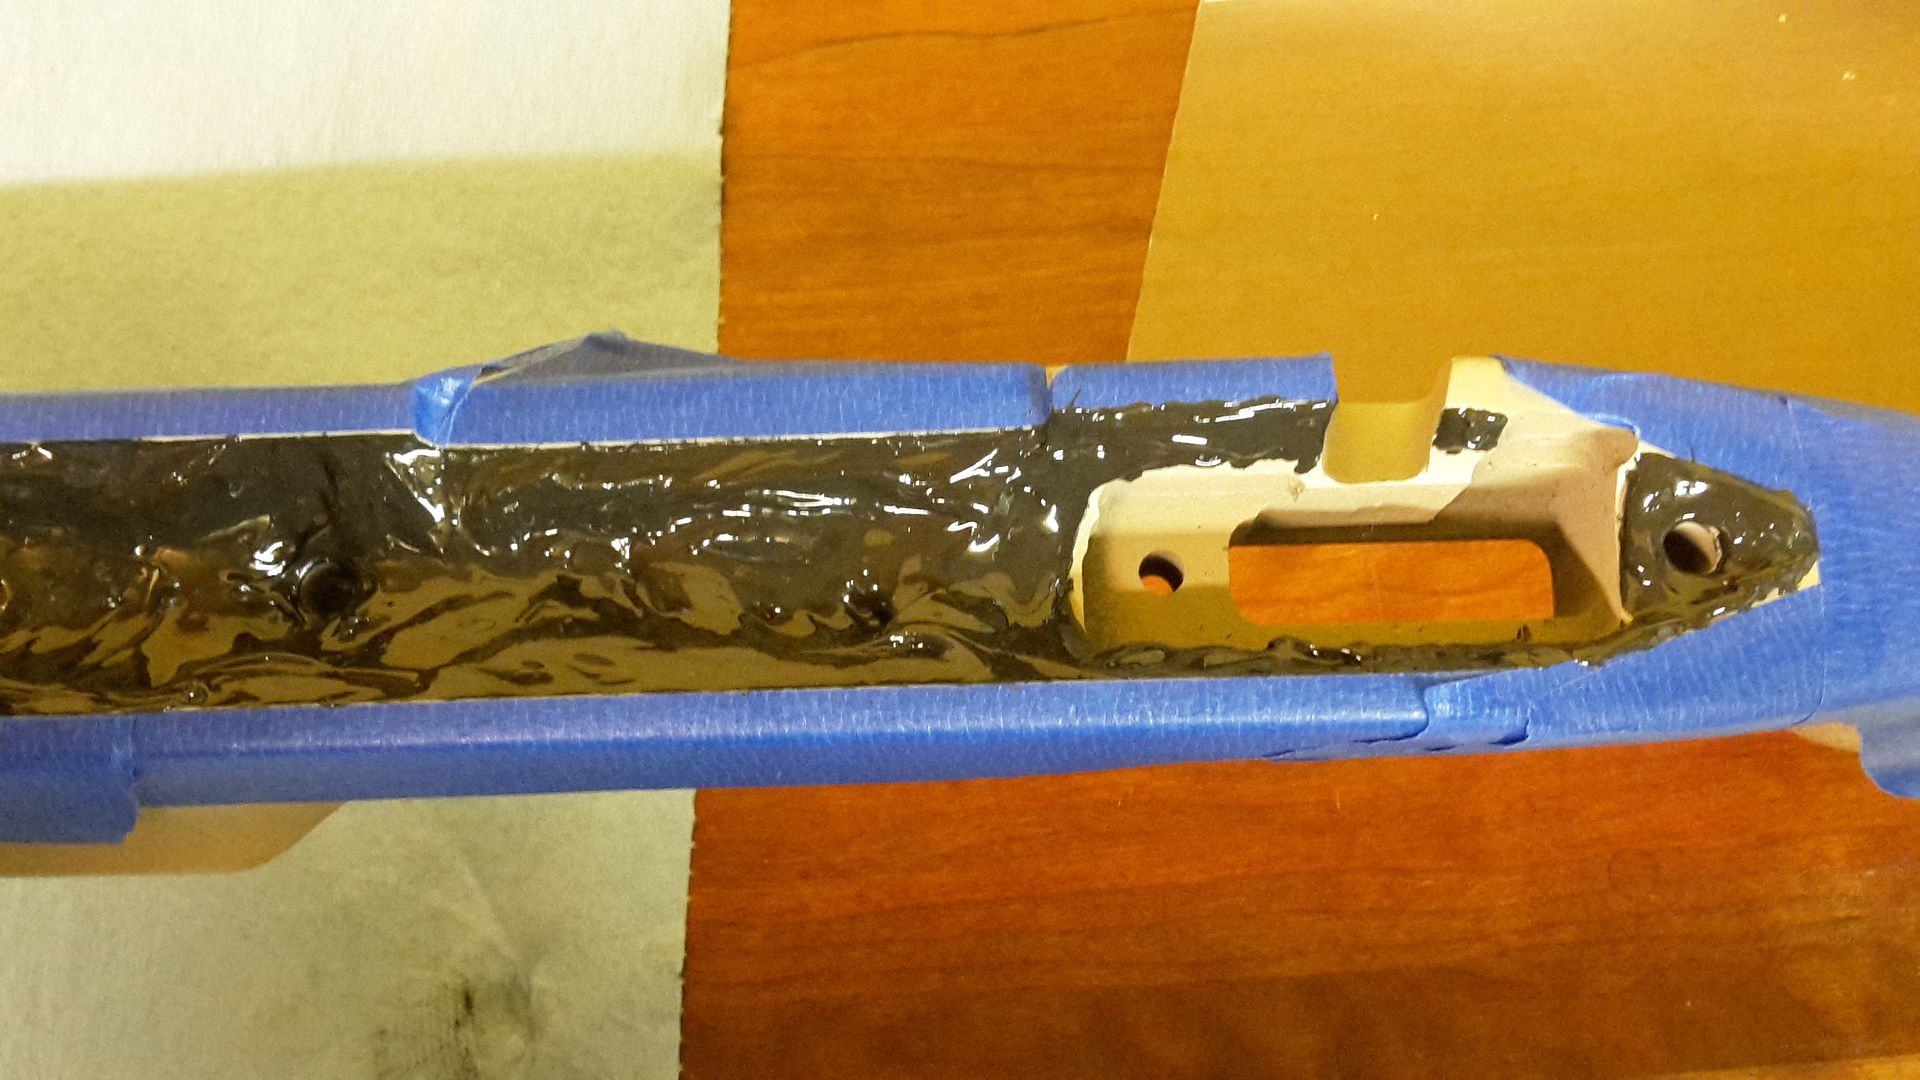
#8: Re: Building a long-range rifle in 300 Jr. Author: Vince, Location: Brisbane AUSTRALIAPosted: Sun May 27, 2018 4:26 am ---- My favorite bedding compound is Marine Tex Gray...
After filling the action and recoil lug recess, I also bedded 3" of the barrel channel, since it is under the straight shank section of the barrel. This will keep any undue stress off of the action itself...after the bedding compound was fully cured, I chiseled and filed it to contour with the stock...
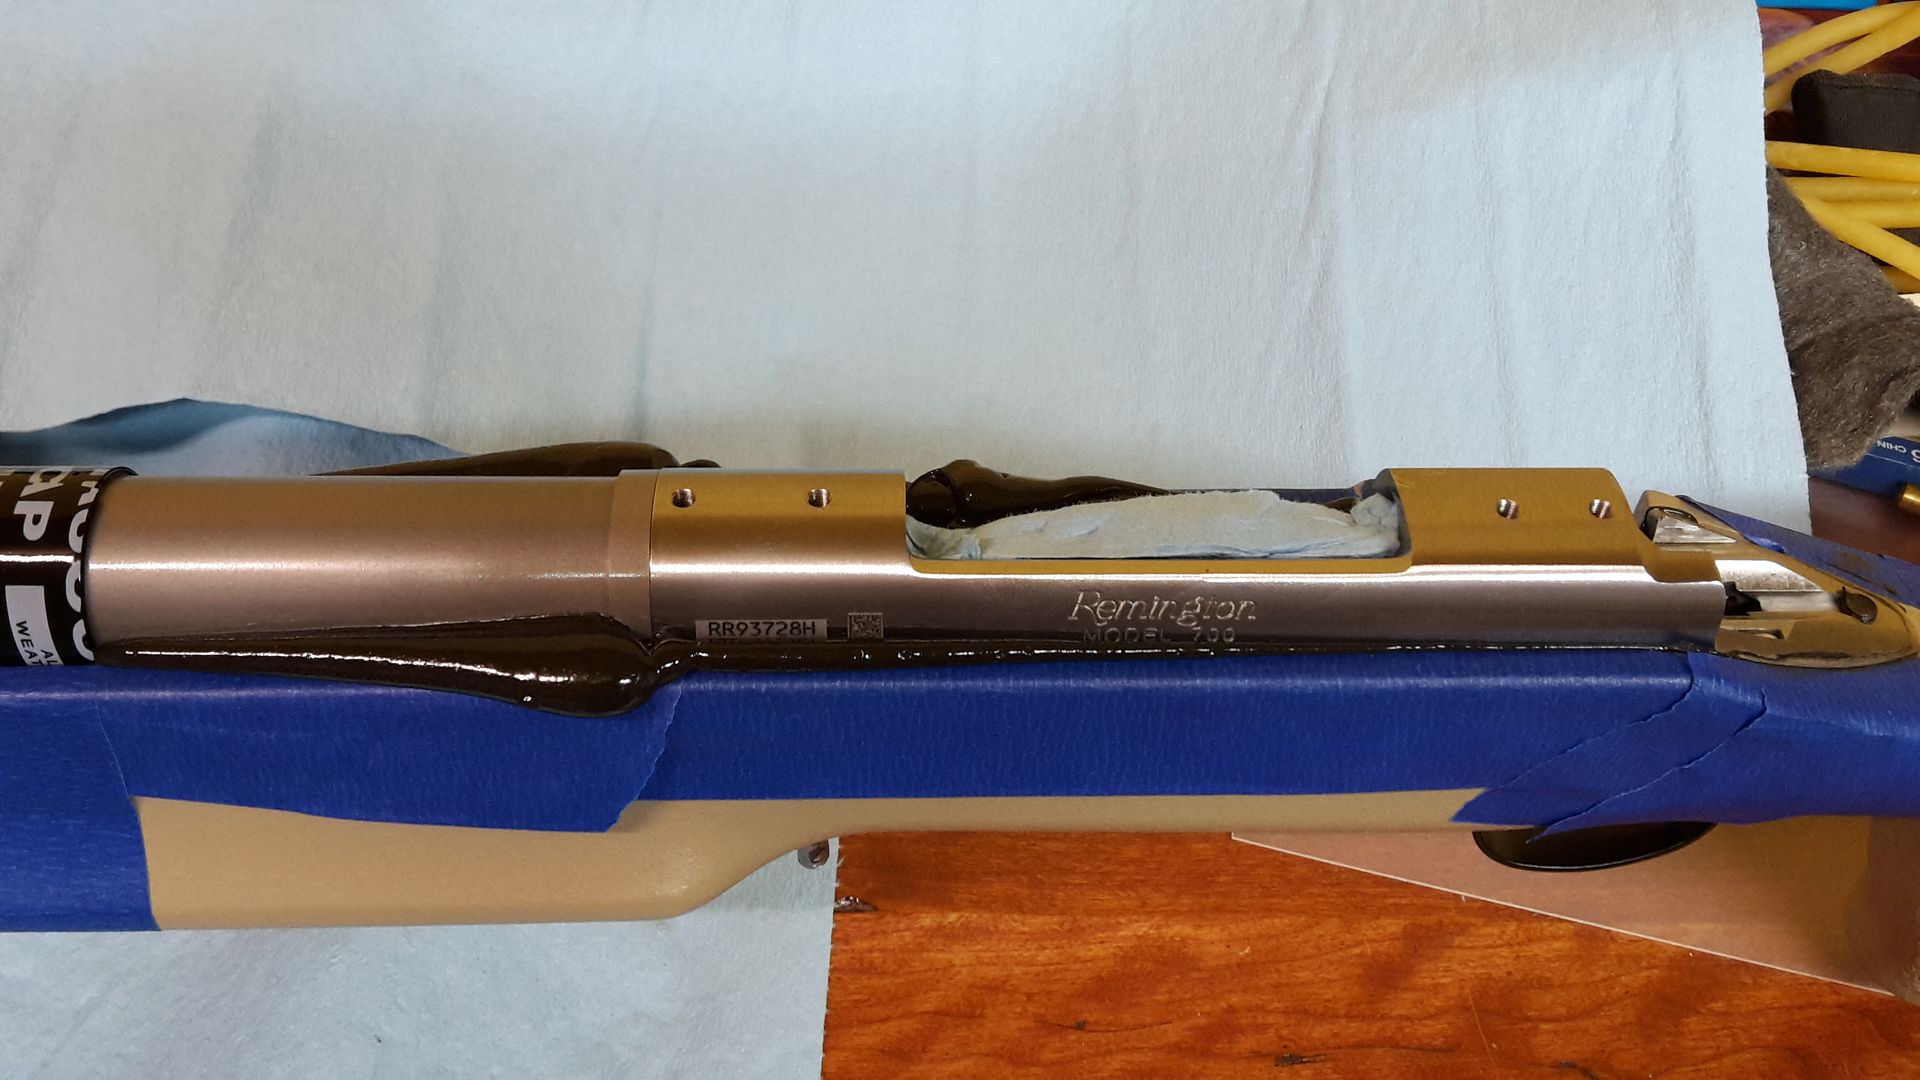
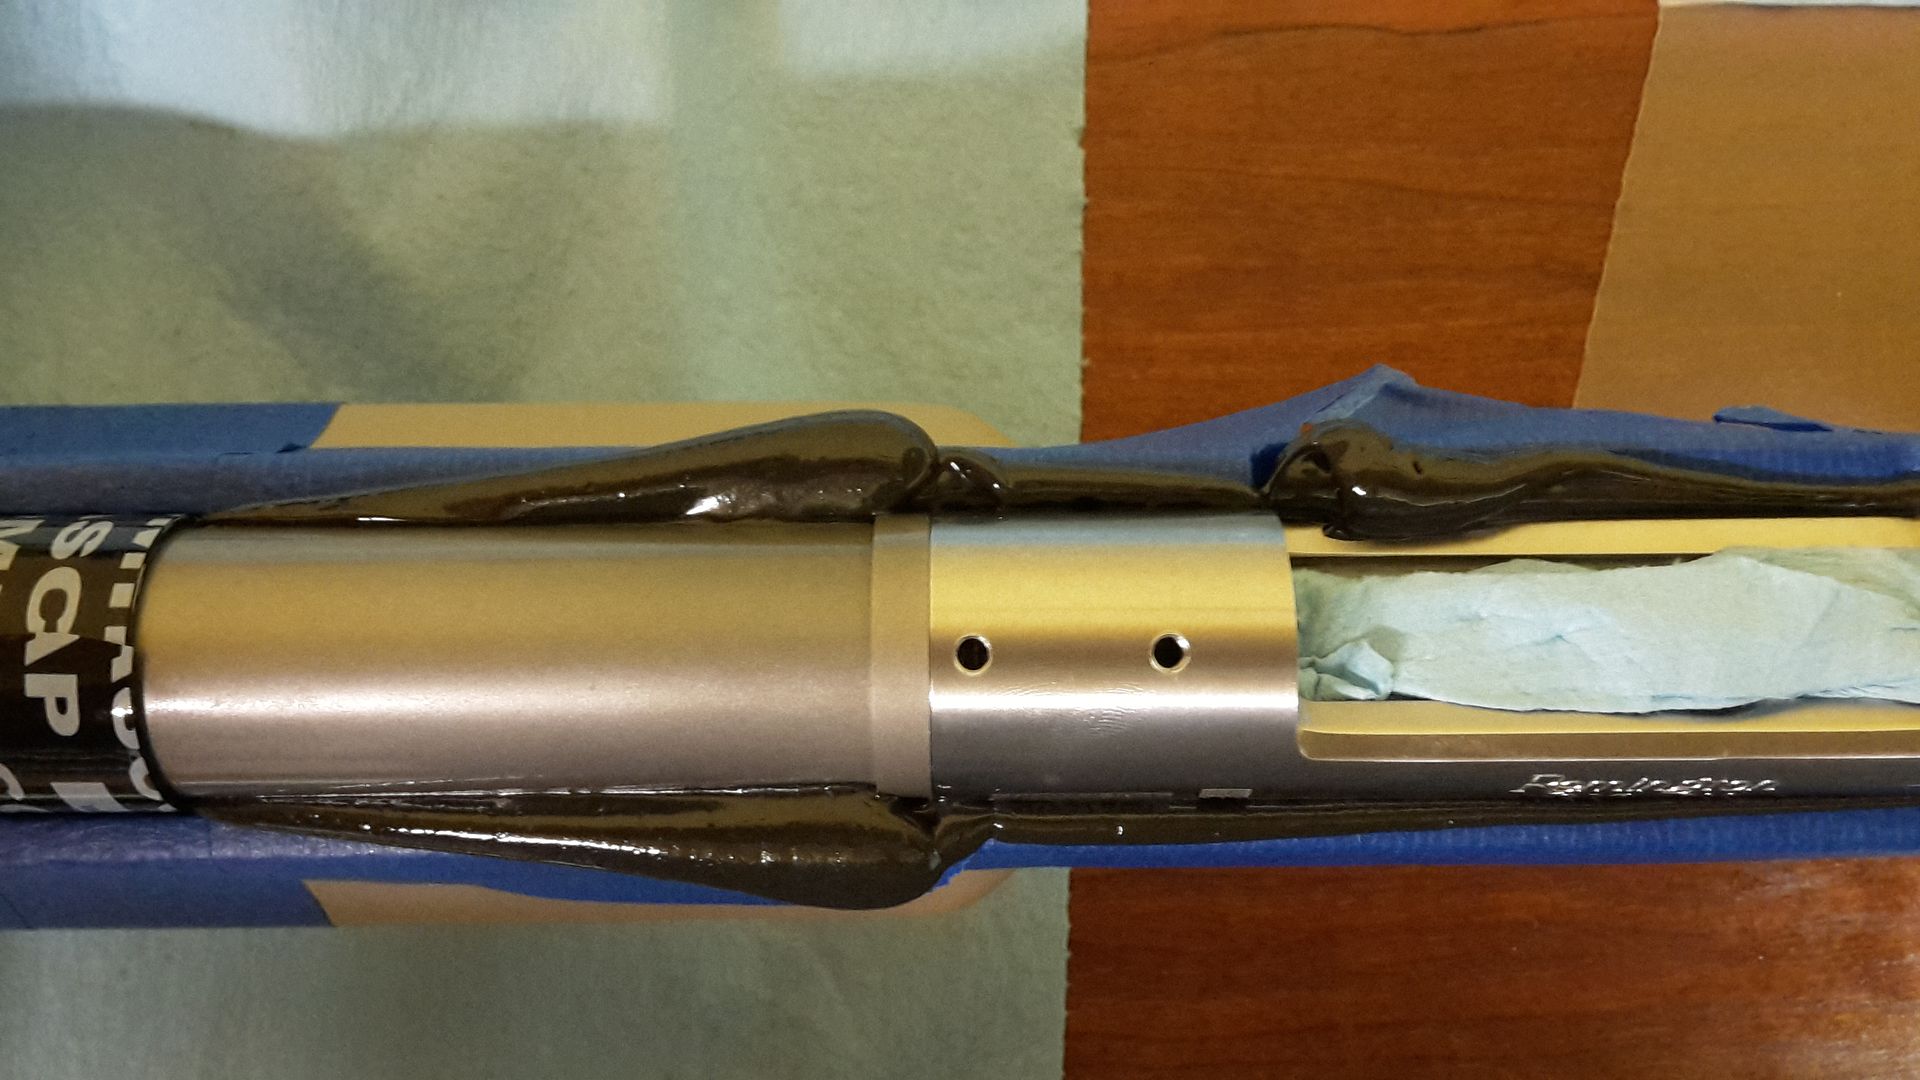
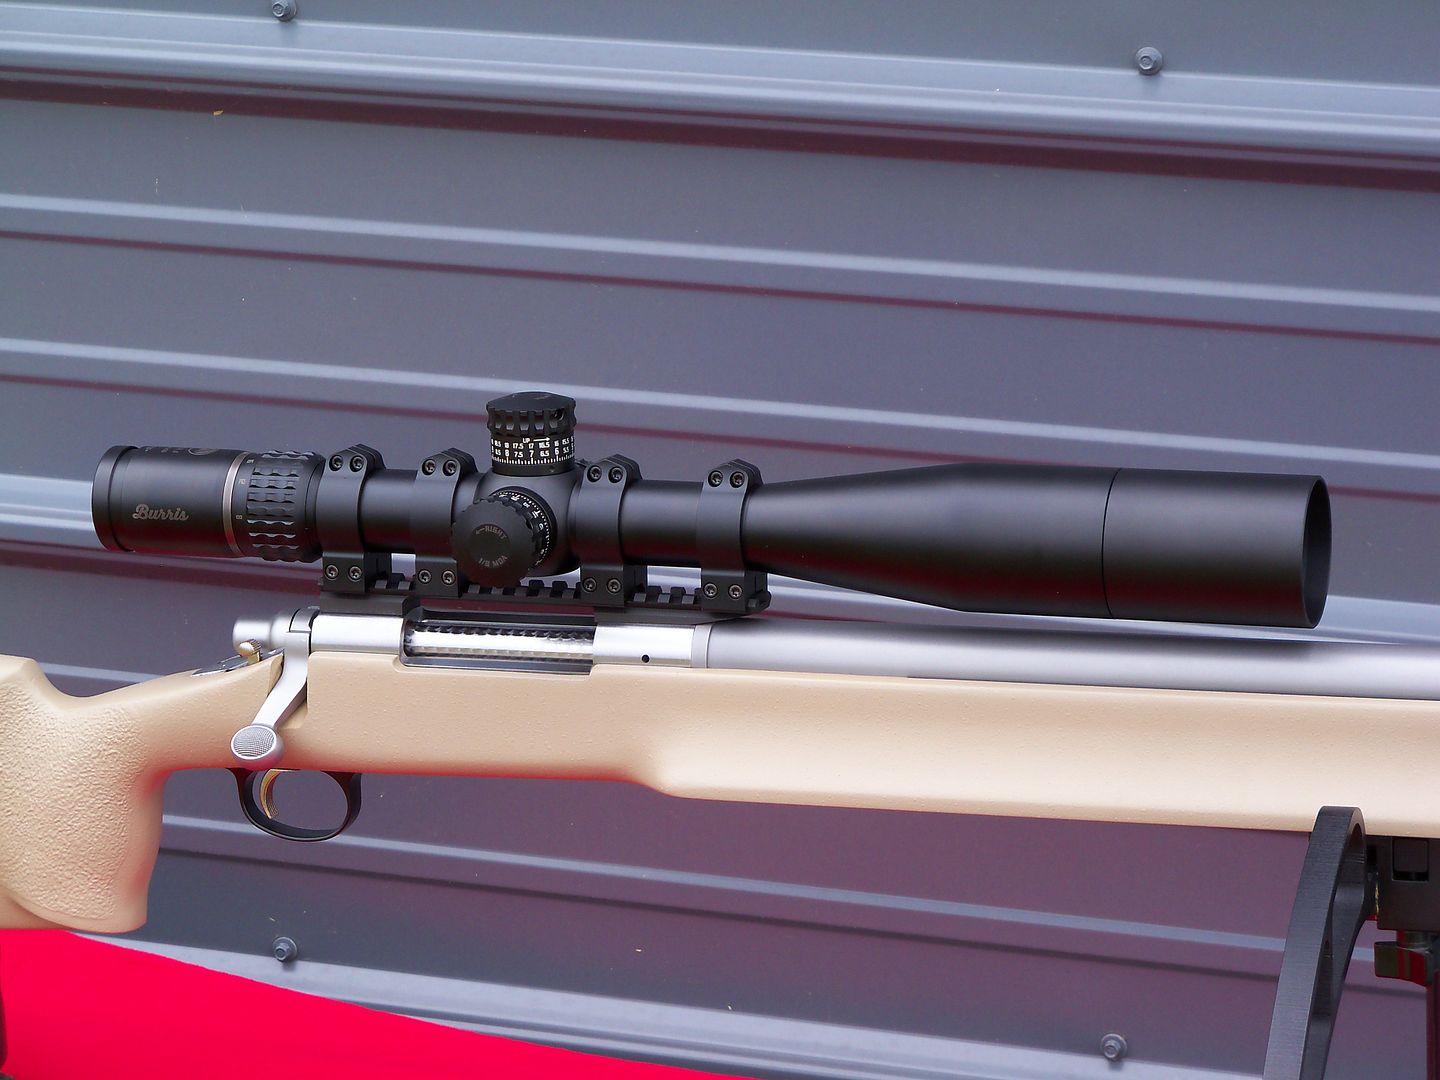
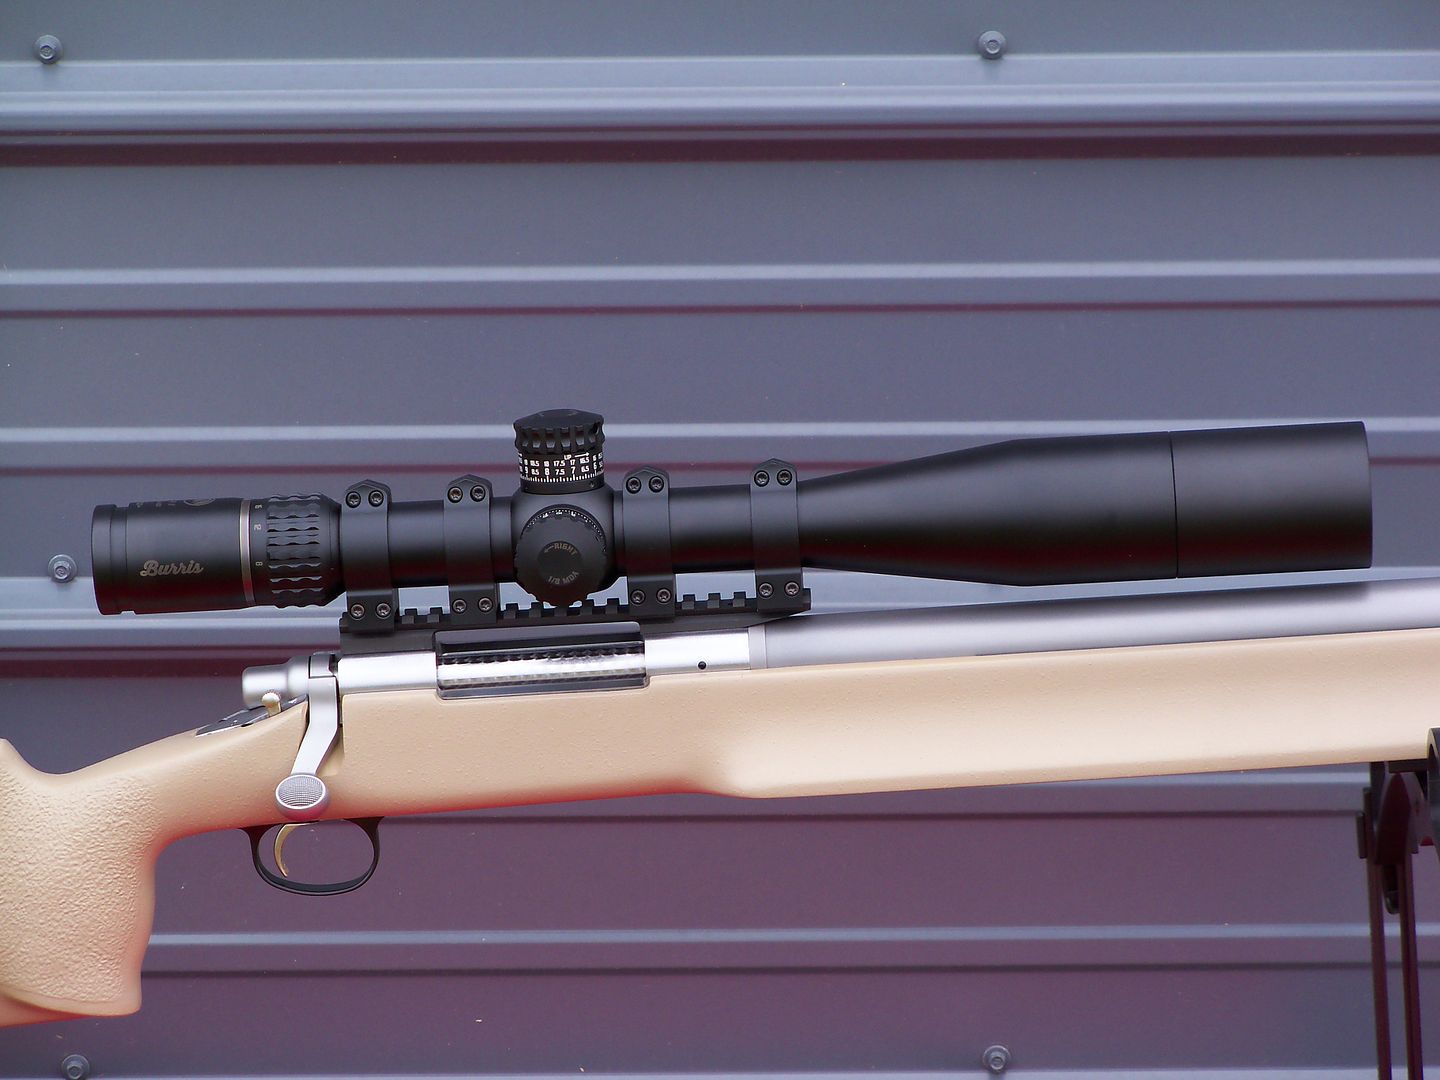
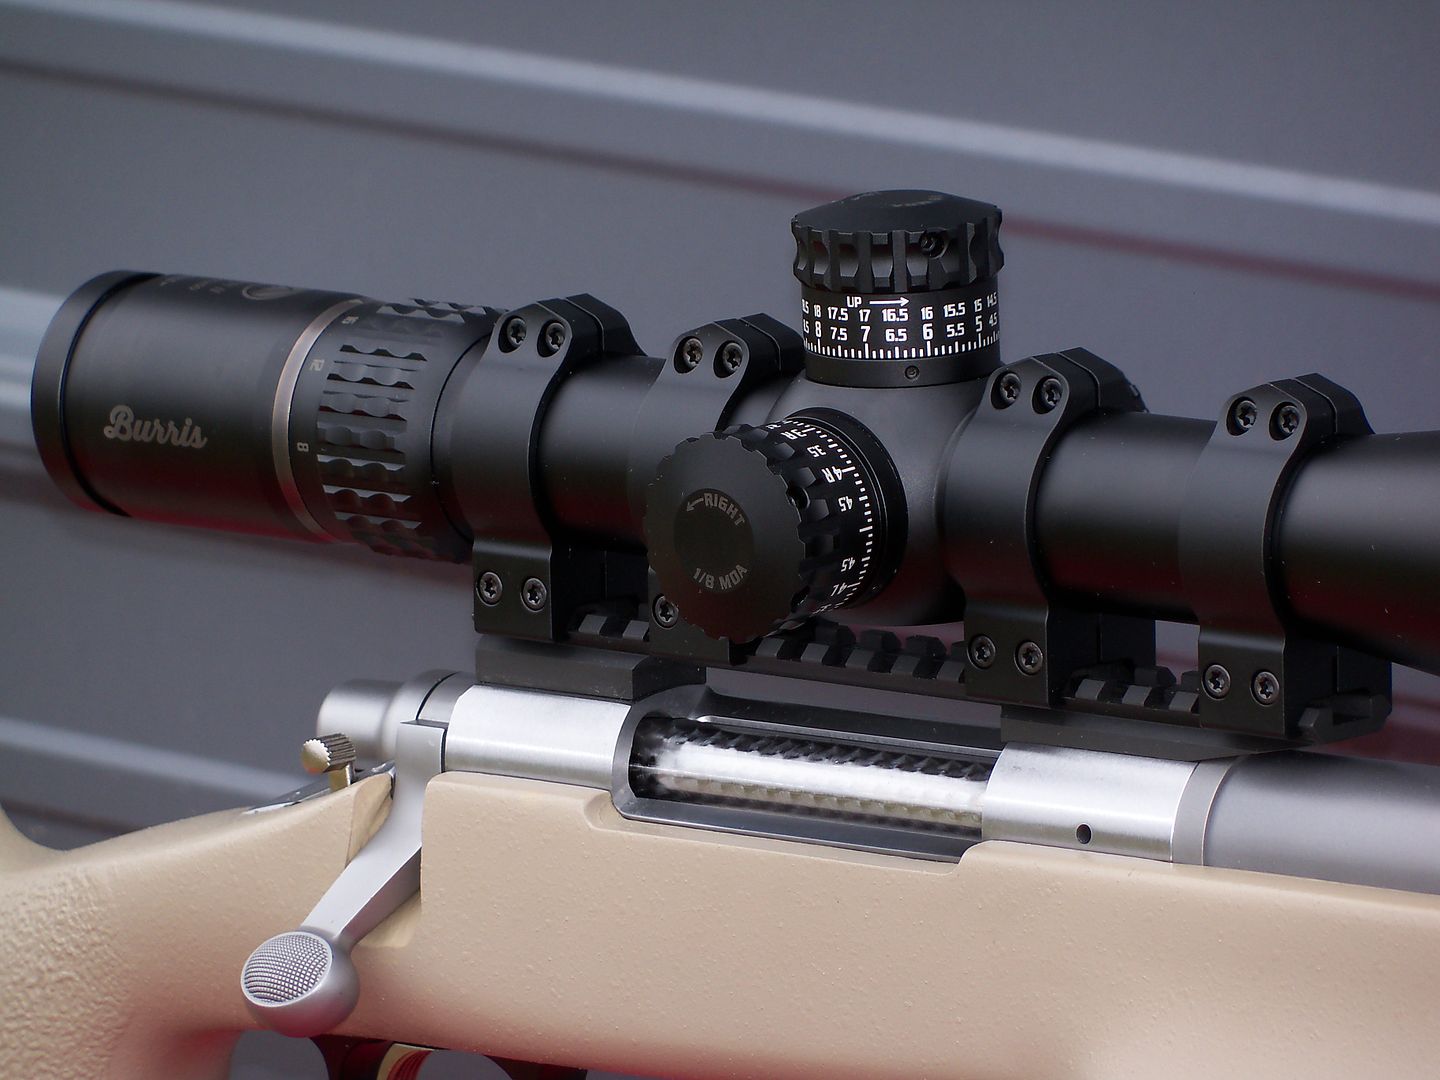
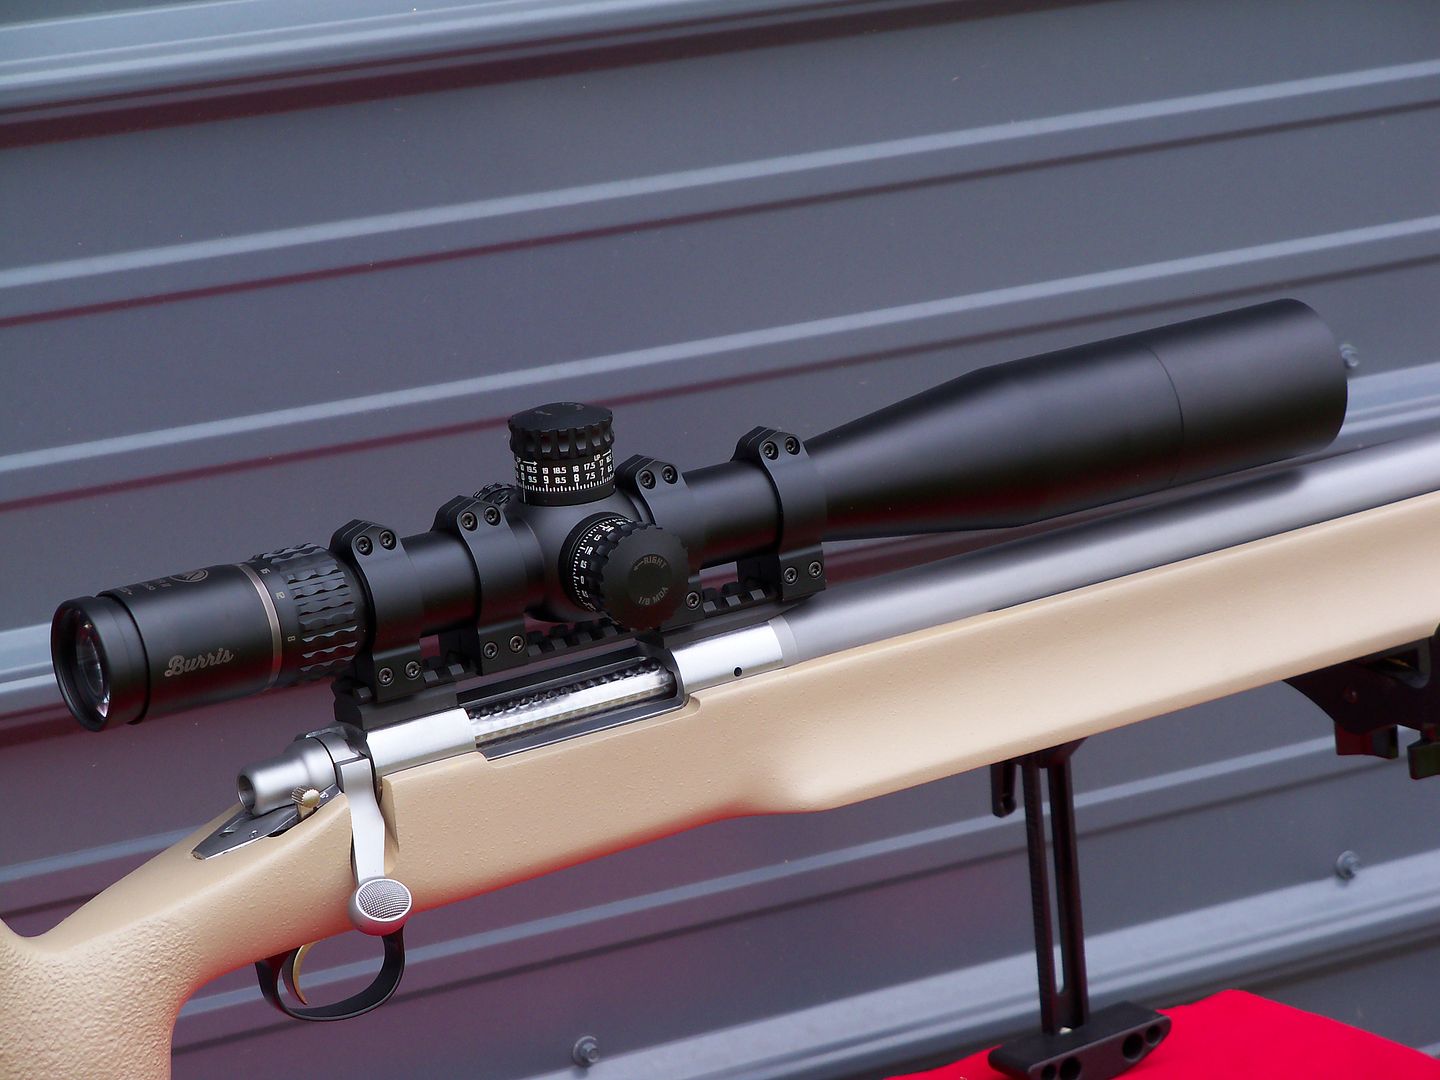
I should be able to have everything finished and the scope mounted sometime this weekend. There is over a pound of steel in the scope base and rings, and I should be able to lock everything down rock solid! I always install the scope base to the action before bedding the action to a stock. All 4 base screws were torqued to 80 inch pounds, and I also epoxy bedded the base to the action...
I have also adjusted the trigger to the customer specified 10 ounces, and it breaks very consistent from pull to pull...
If everything goes according to plan, the next pictures should be of a completed rifle. After that, the only thing left is to finish chambering the hand die and bullet seating die...
Thanks guy, I appreciate the compliments, thank you!
Stay tuned for the conclusion of this build...
#9: Re: Building a long-range rifle in 300 Jr. Author: Vince, Location: Brisbane AUSTRALIAPosted: Sun May 27, 2018 4:47 am ----
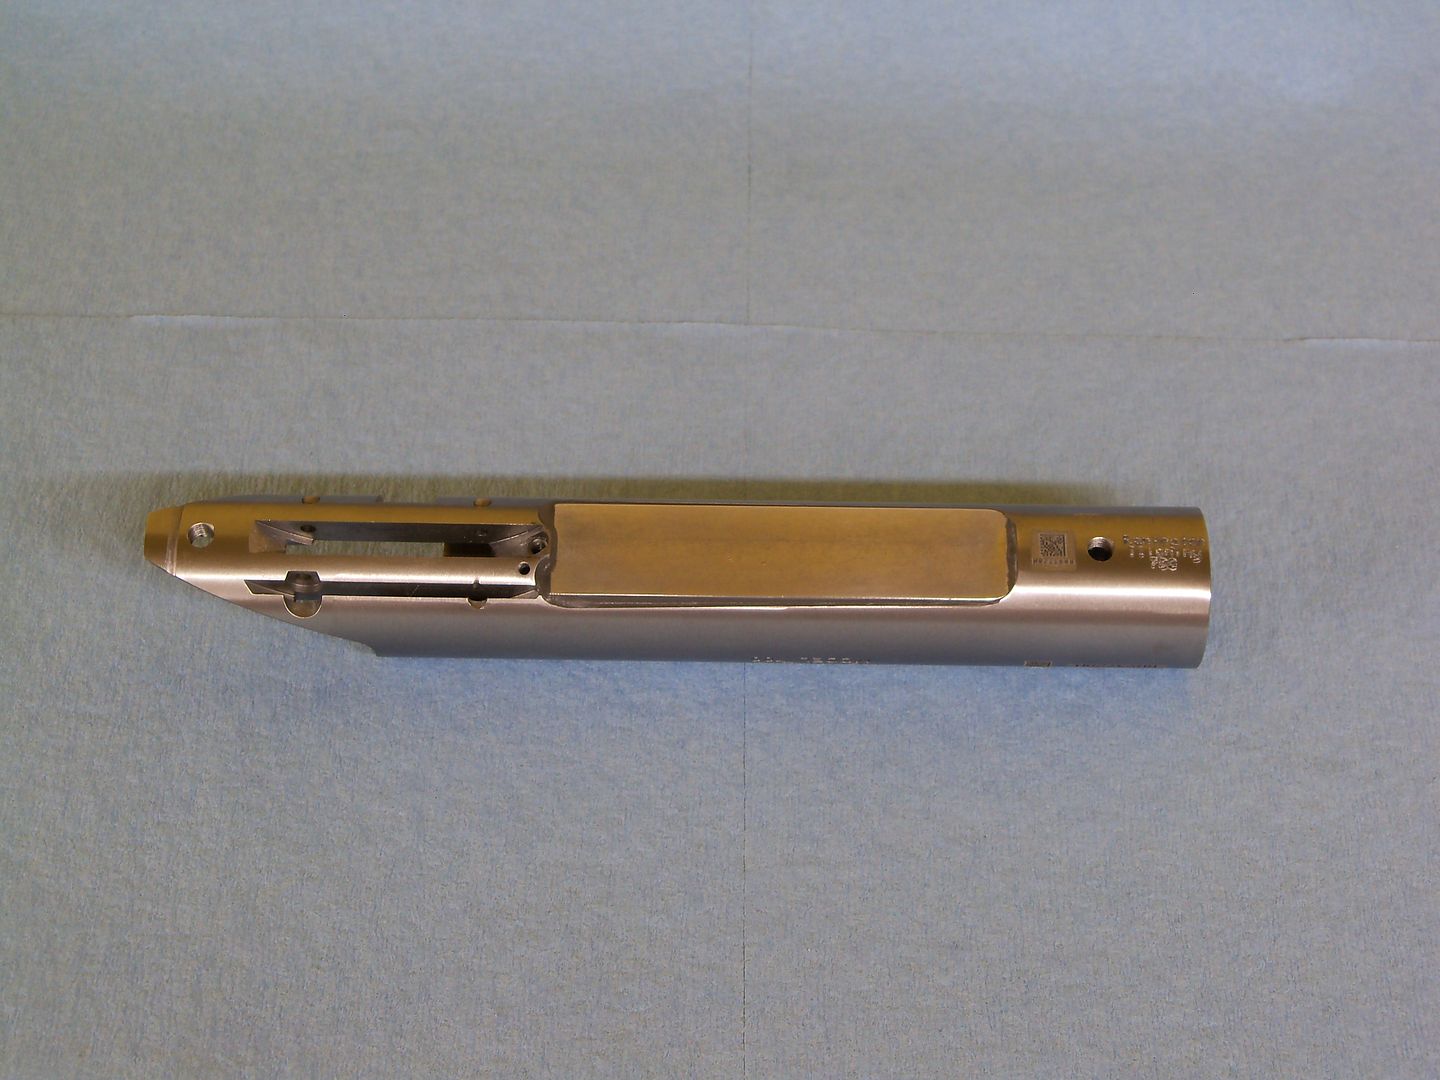
Factory bolt face -
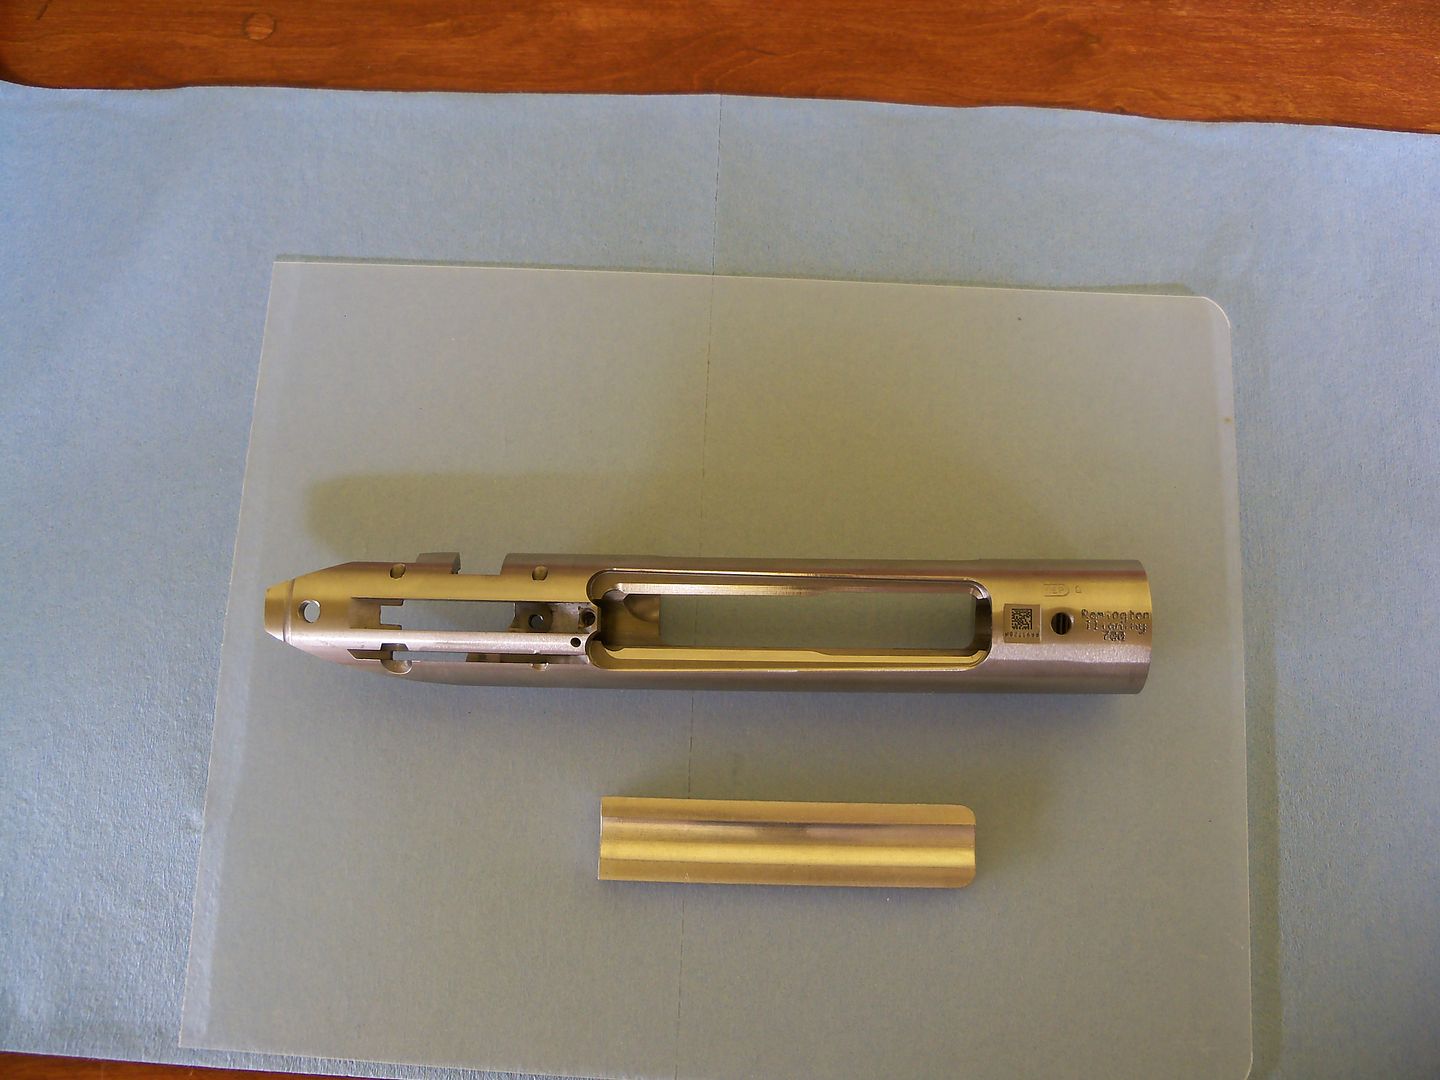
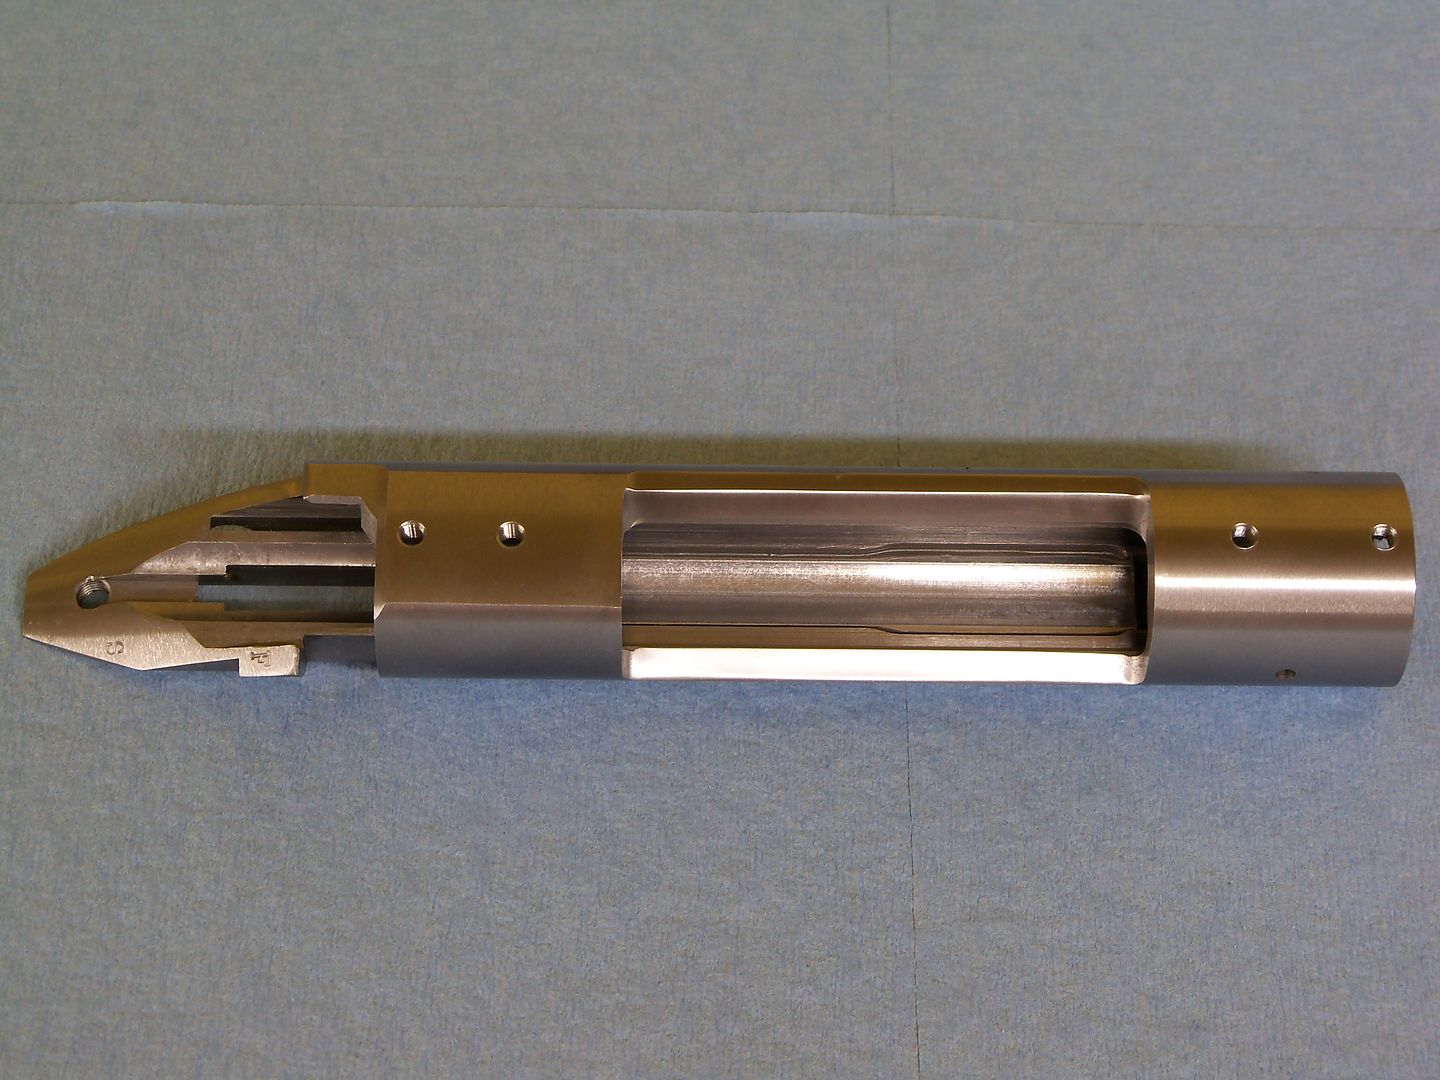
This shows the front of the Remington action with their "grinding" marks on it -
Action set up for the truing process -
The face of the action was NOT square and one lug set .004 higher than the other! So then the bolt was in battery, it was sitting .004 high and above center! Not good!
When I turned the barrel between centers for threading, I always cut the threads .0015 over size so I can lap the barrel and action threads together. There is "0" play between the barrel and action threads...
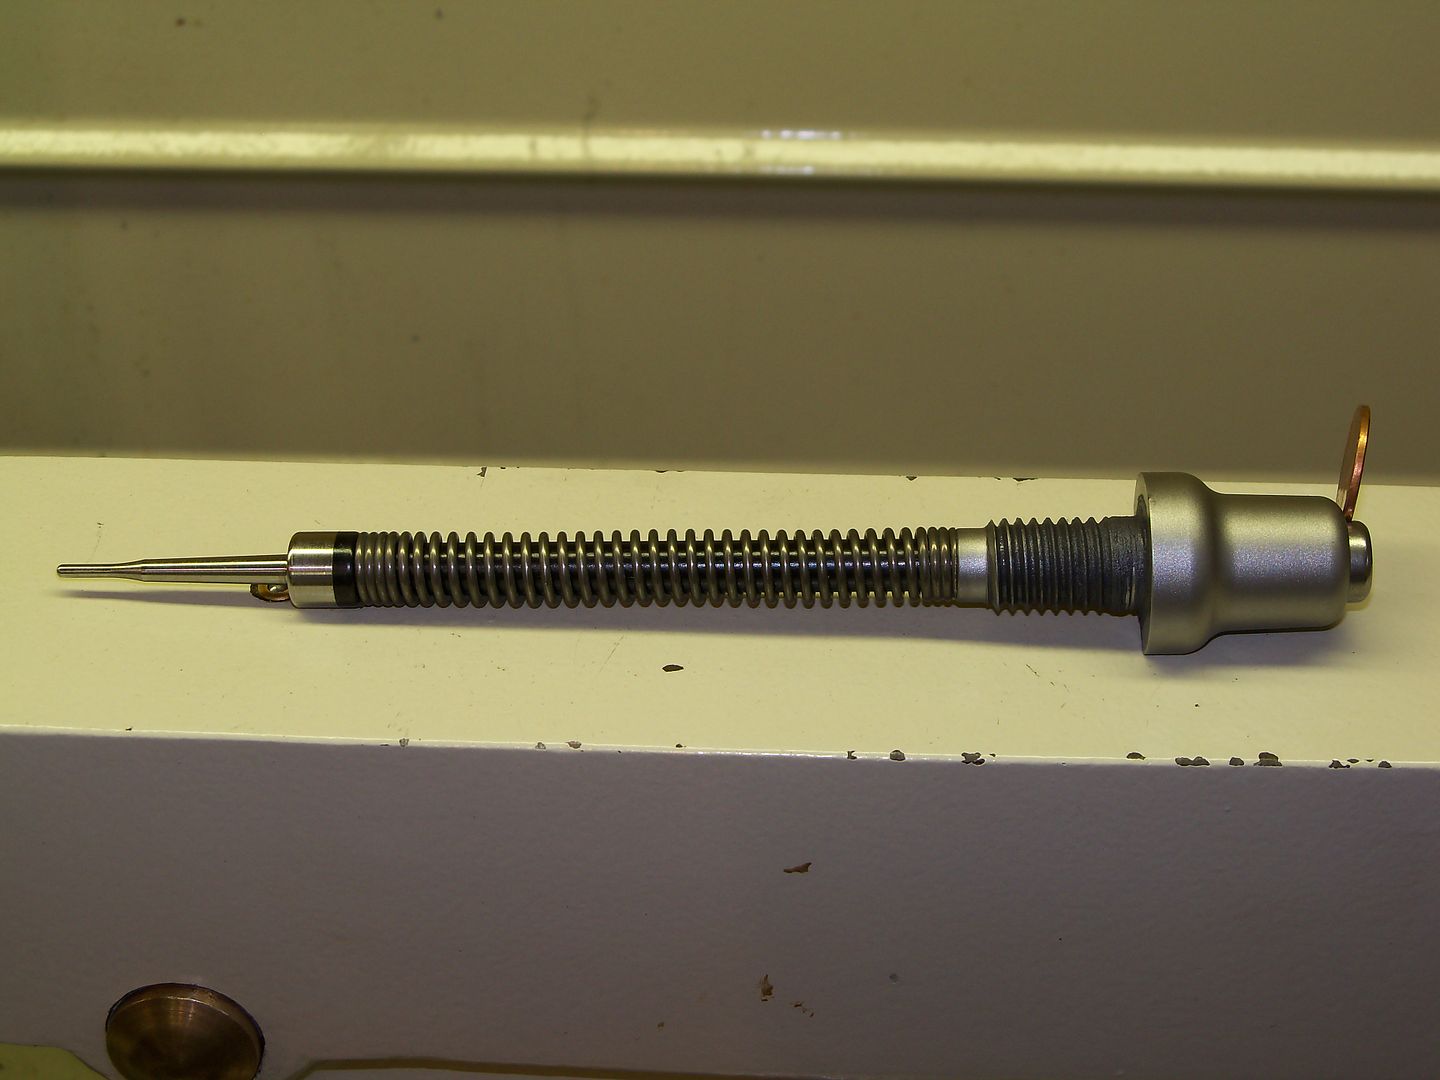
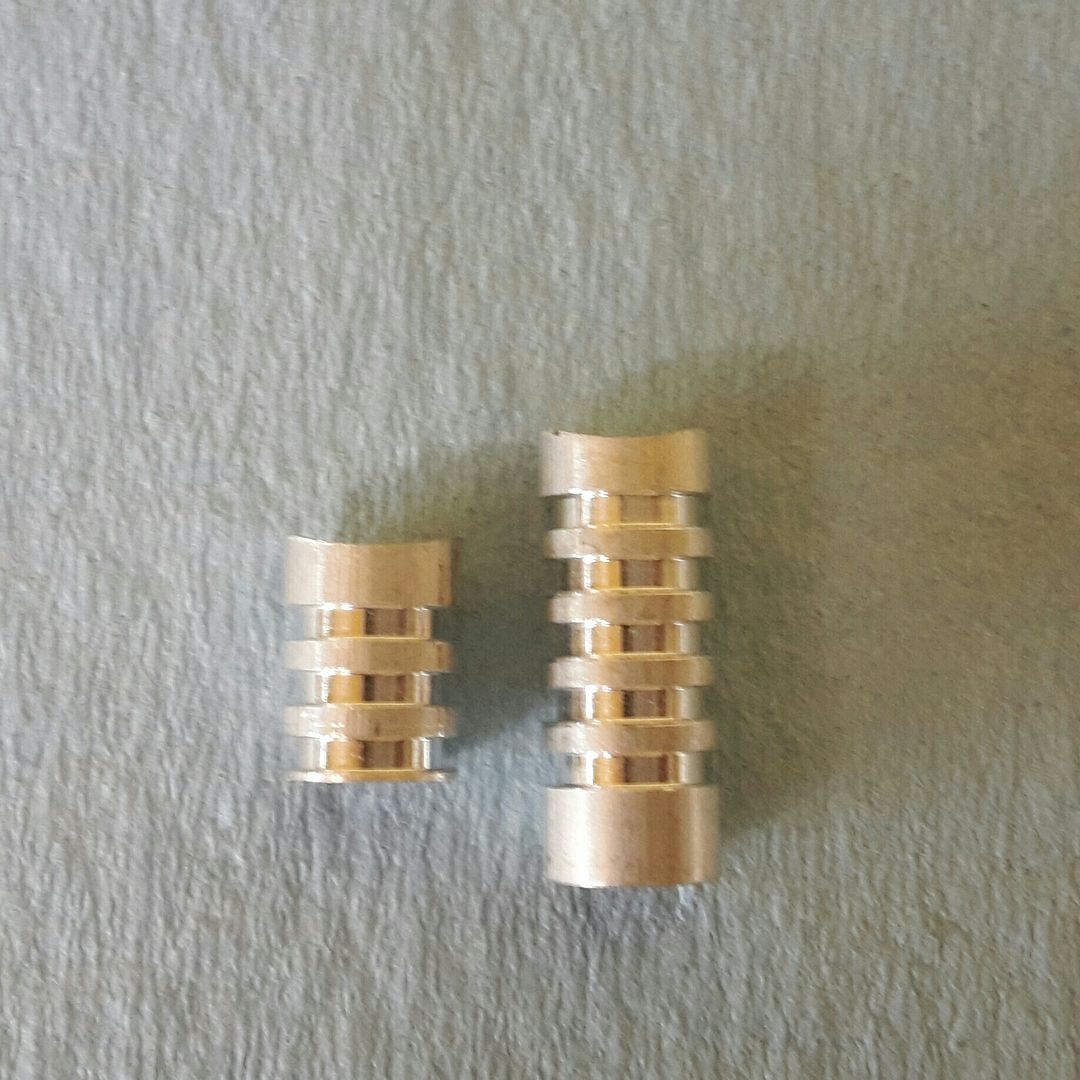
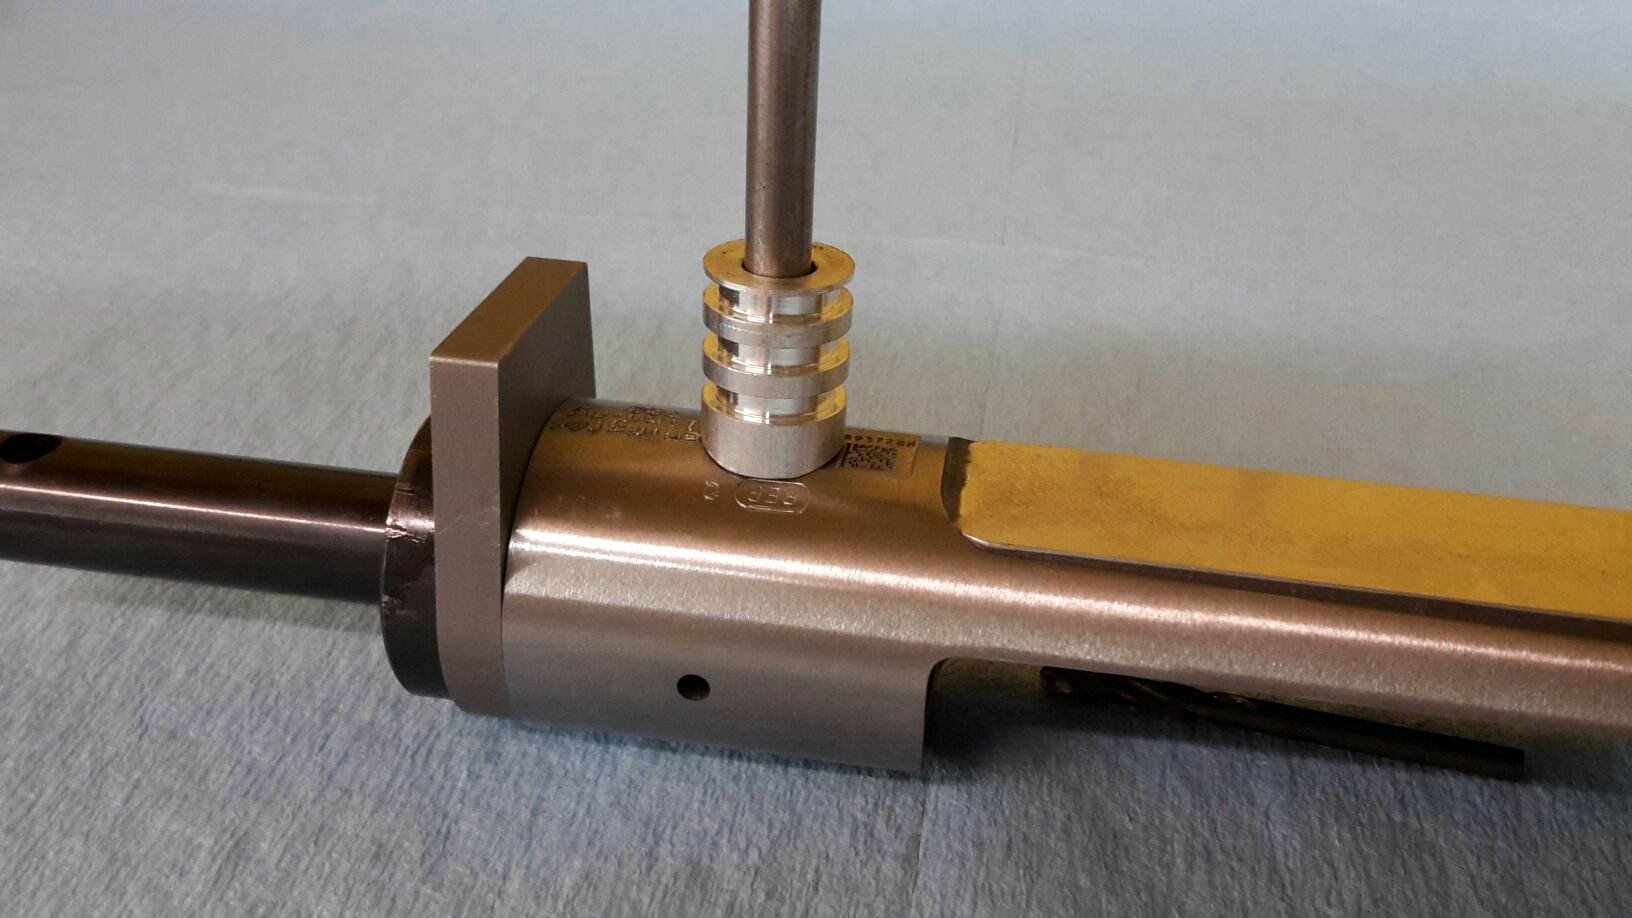
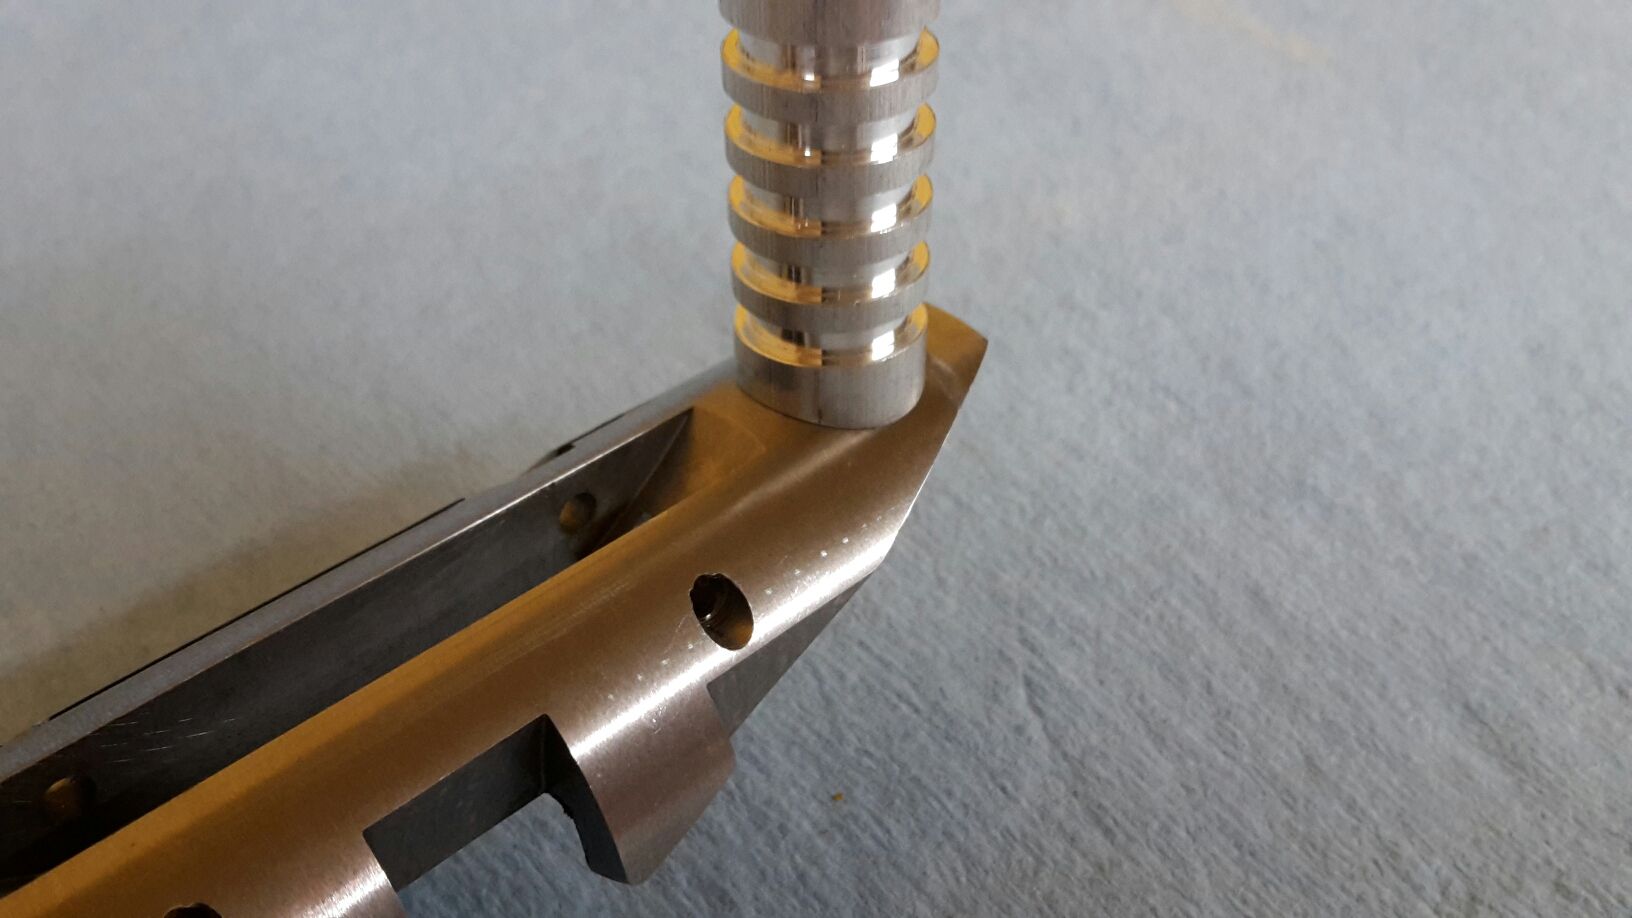
I replaced the factory firing pin and spring with a much lighter weight firing pin, and a heavier firing pin spring. I also turned the firing pin tip to where it is .0005 smaller that the firing pin hole. The assembly shown here is less than half the weight of the factory firing pin and spring...
I set the action up "between centers" so I could re-drill and tap the base holes to the larger 8-40 screws...
Then I modified the base for the larger screws as well...
And last, since my customer wanted the muzzle brake to be left oversize, I made one for this build that is 1.250" in diameter. I went ahead and made 2 more brakes that are 1" in diameter, since I already had everything set up on the milling machine...
Two Custom Encore barrels that I built and put muzzle brakes on. One is chambered in 308 Winchester and the other one is a 6mm Bench Rest...
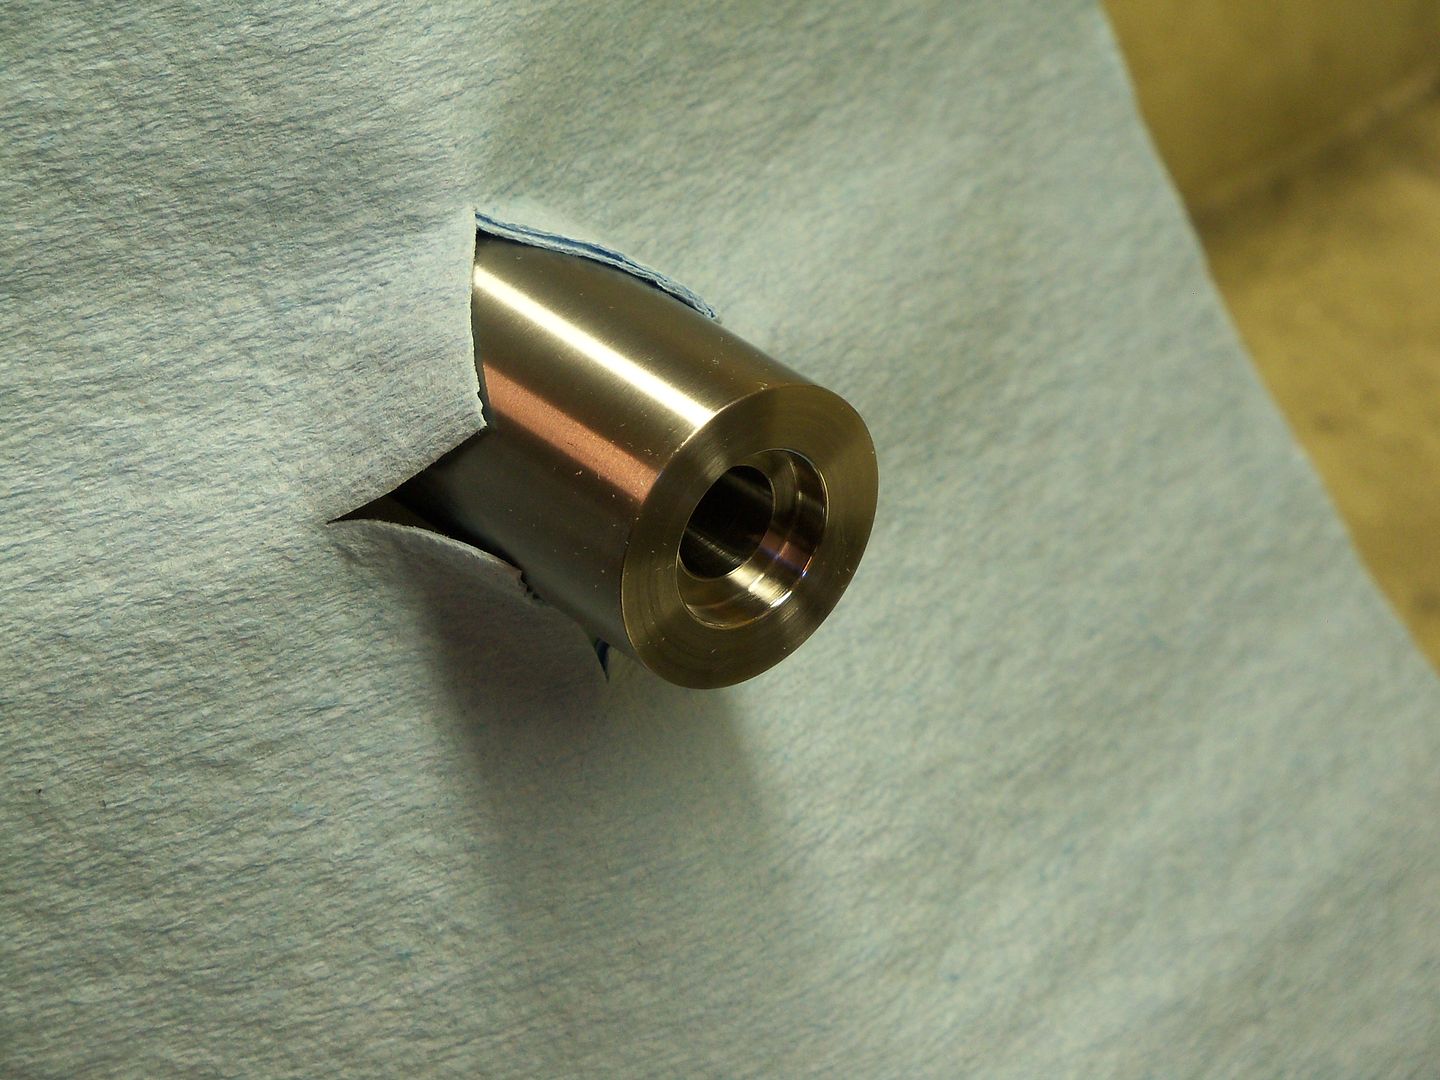
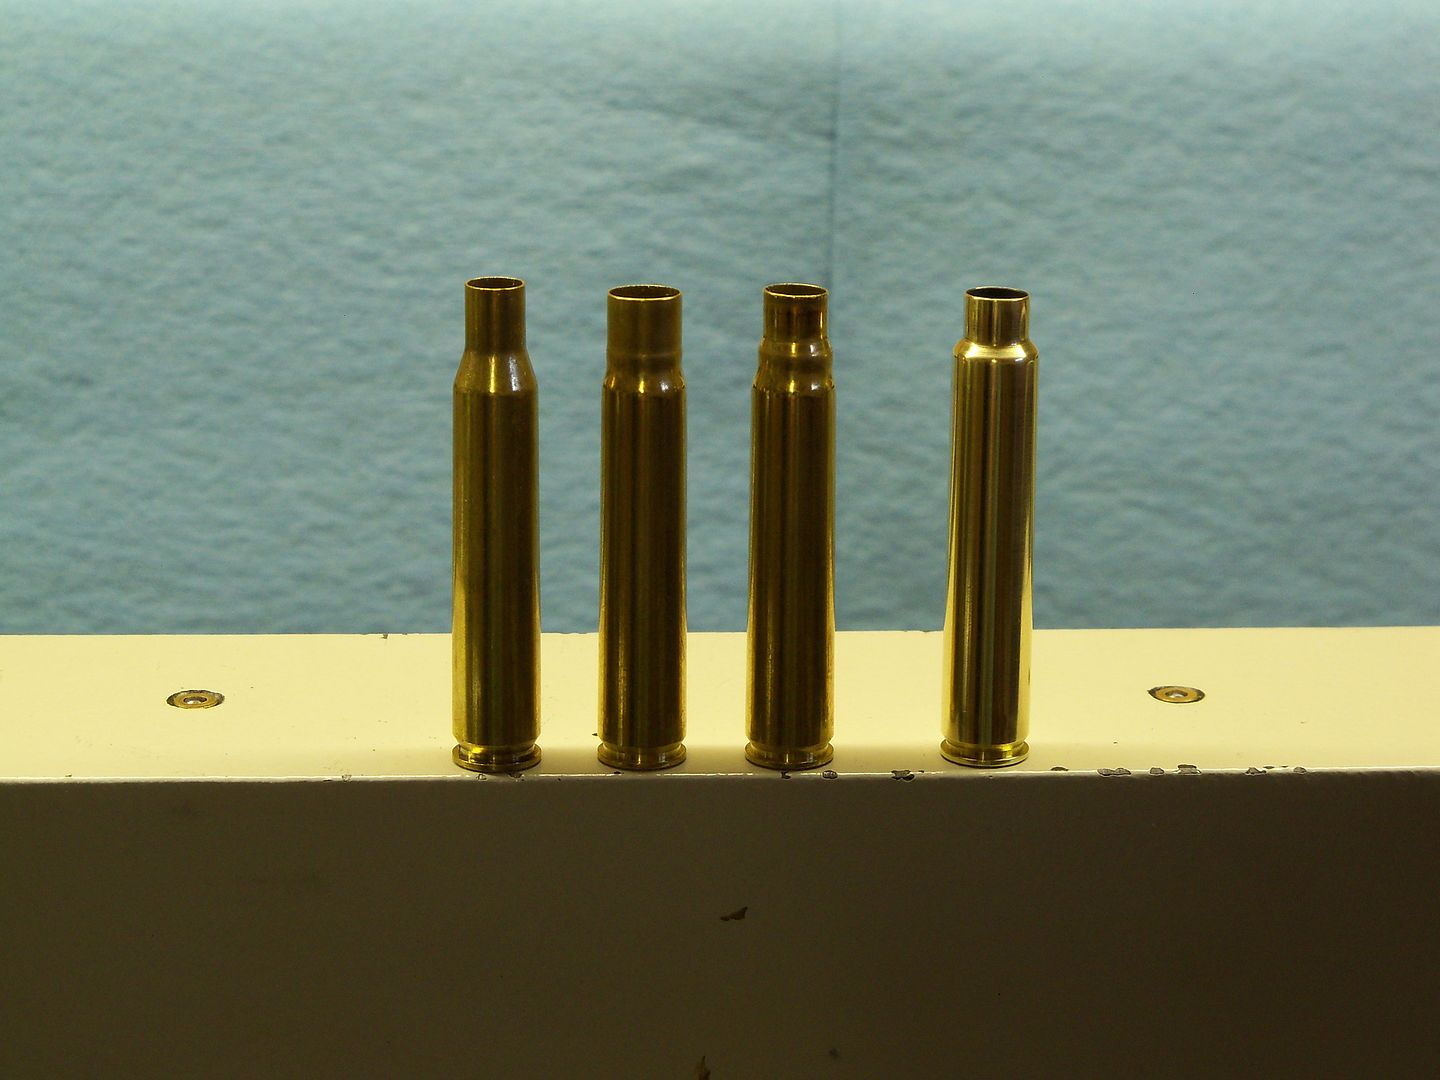
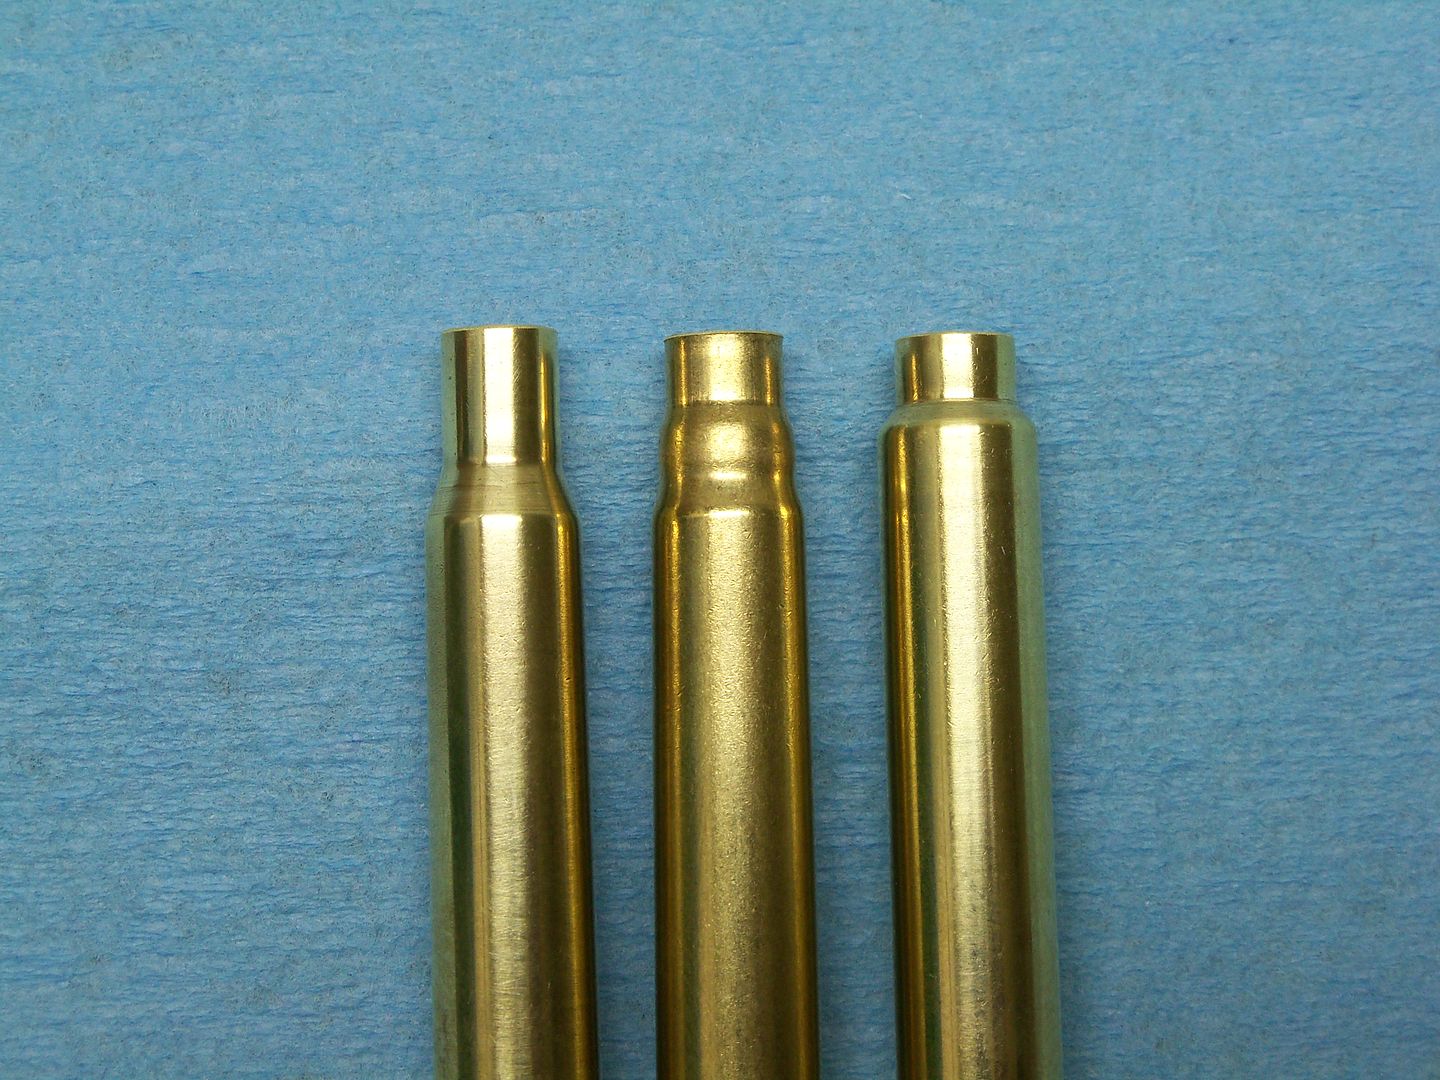
Starting off with new Norma brass in 280 Remington, the case is expanded to .35 caliber, then necked down to .30 caliber to create a secondary shoulder, loaded and fired in the guns chamber, you now have what I call my 300 Jr.. Neck length is .220...
Okay guys, I'm going to let the pictures speak for themselves!
The barrel is now finished!
Here is a better picture of my cartridge case -
Bedding the single shot follower in place...
This follower puts the cartridge in alignment with the chamber, so all you have to do is place a round on it, push the bolt forward, and it feeds the cartridge straight into the chamber...
Got the pillars made this morning, and getting ready to glue them in place...
Okay guys, any one interested in a custom rifle, rebarrel, rechamber, muzzle brake, barrel threading, muzzle crowning, etc., send me an email...